
COVID-19 = Boredom = Projects, the front porch…part 2!
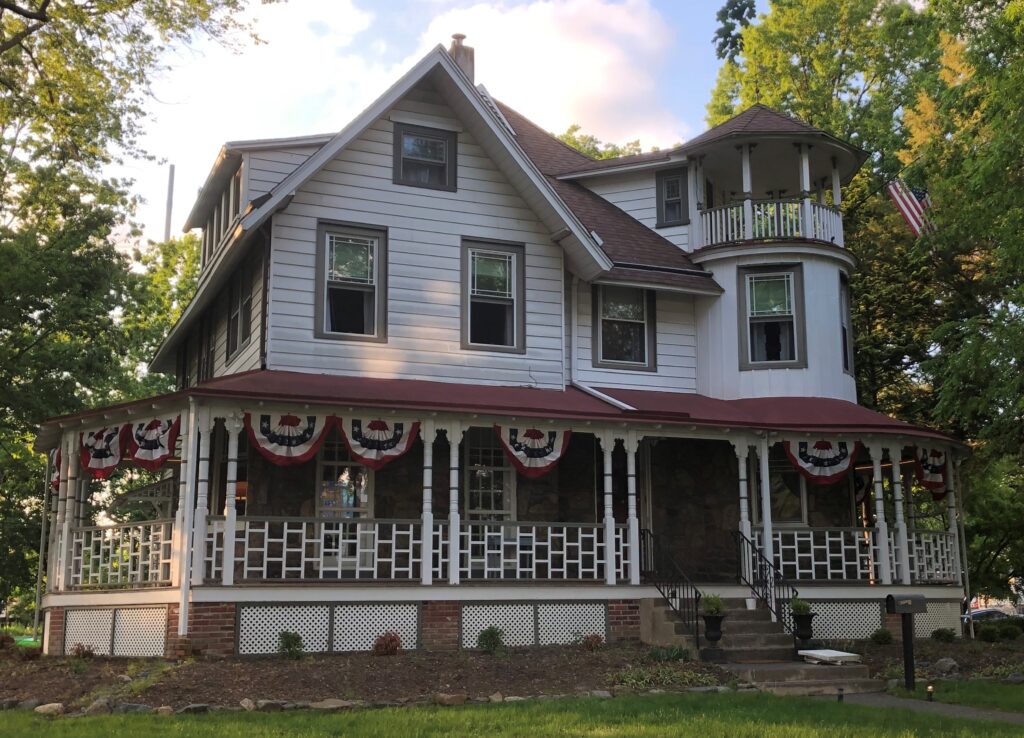
If you remember back to last May, we were all trying to find ways to occupy our time while sheltering in place, and for me, that time was spent on the wrap around porch of the Good House, removing the 3 colors of flaking gray paint that had been slopped onto the floor.
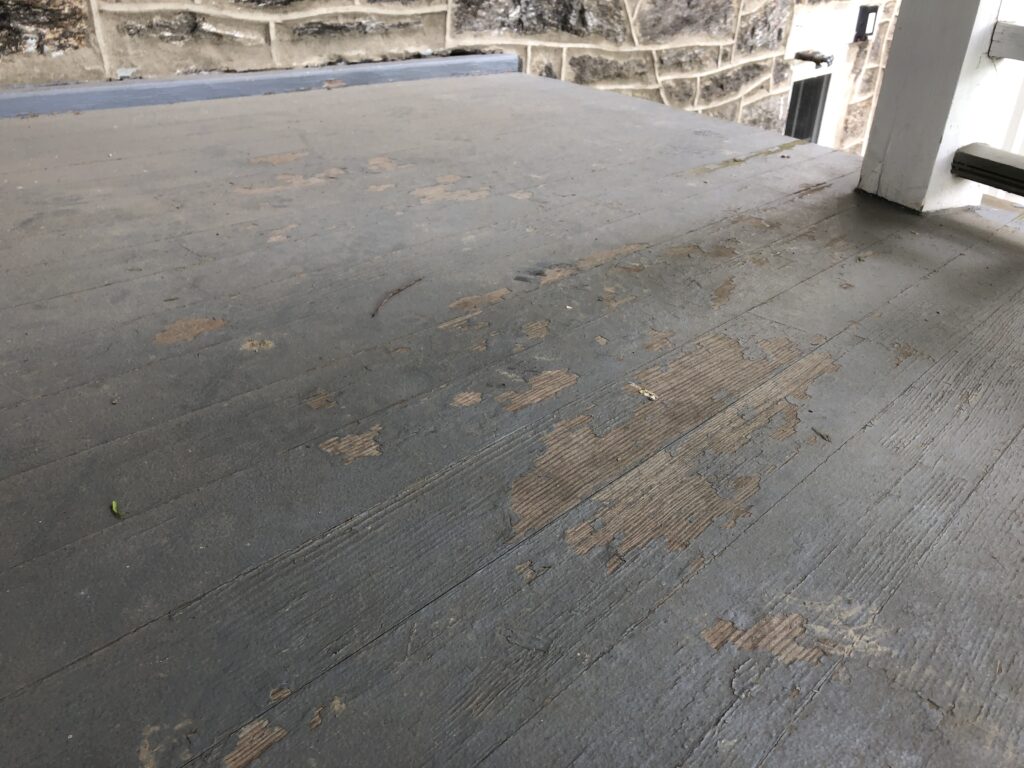
Before 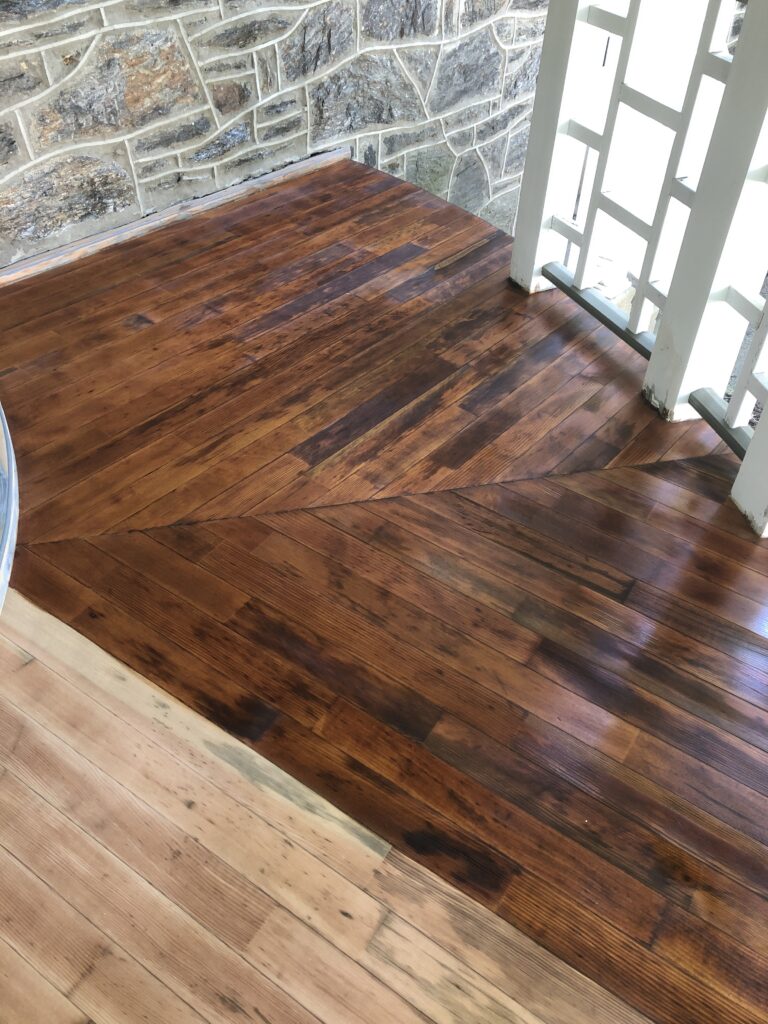
During 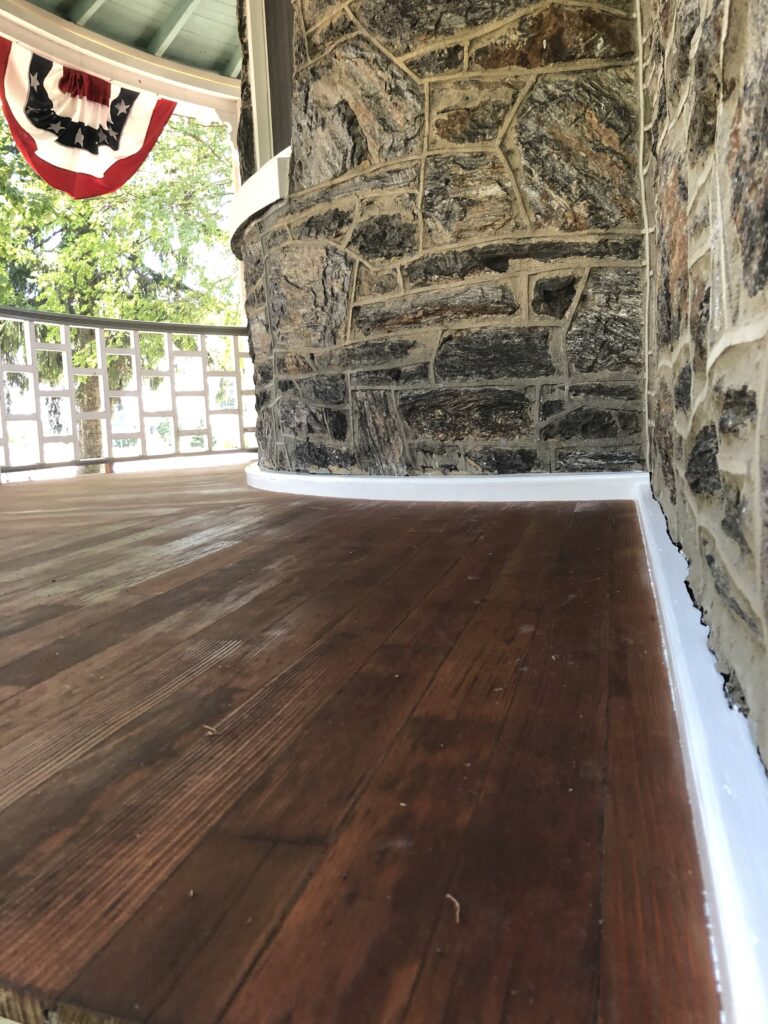
After
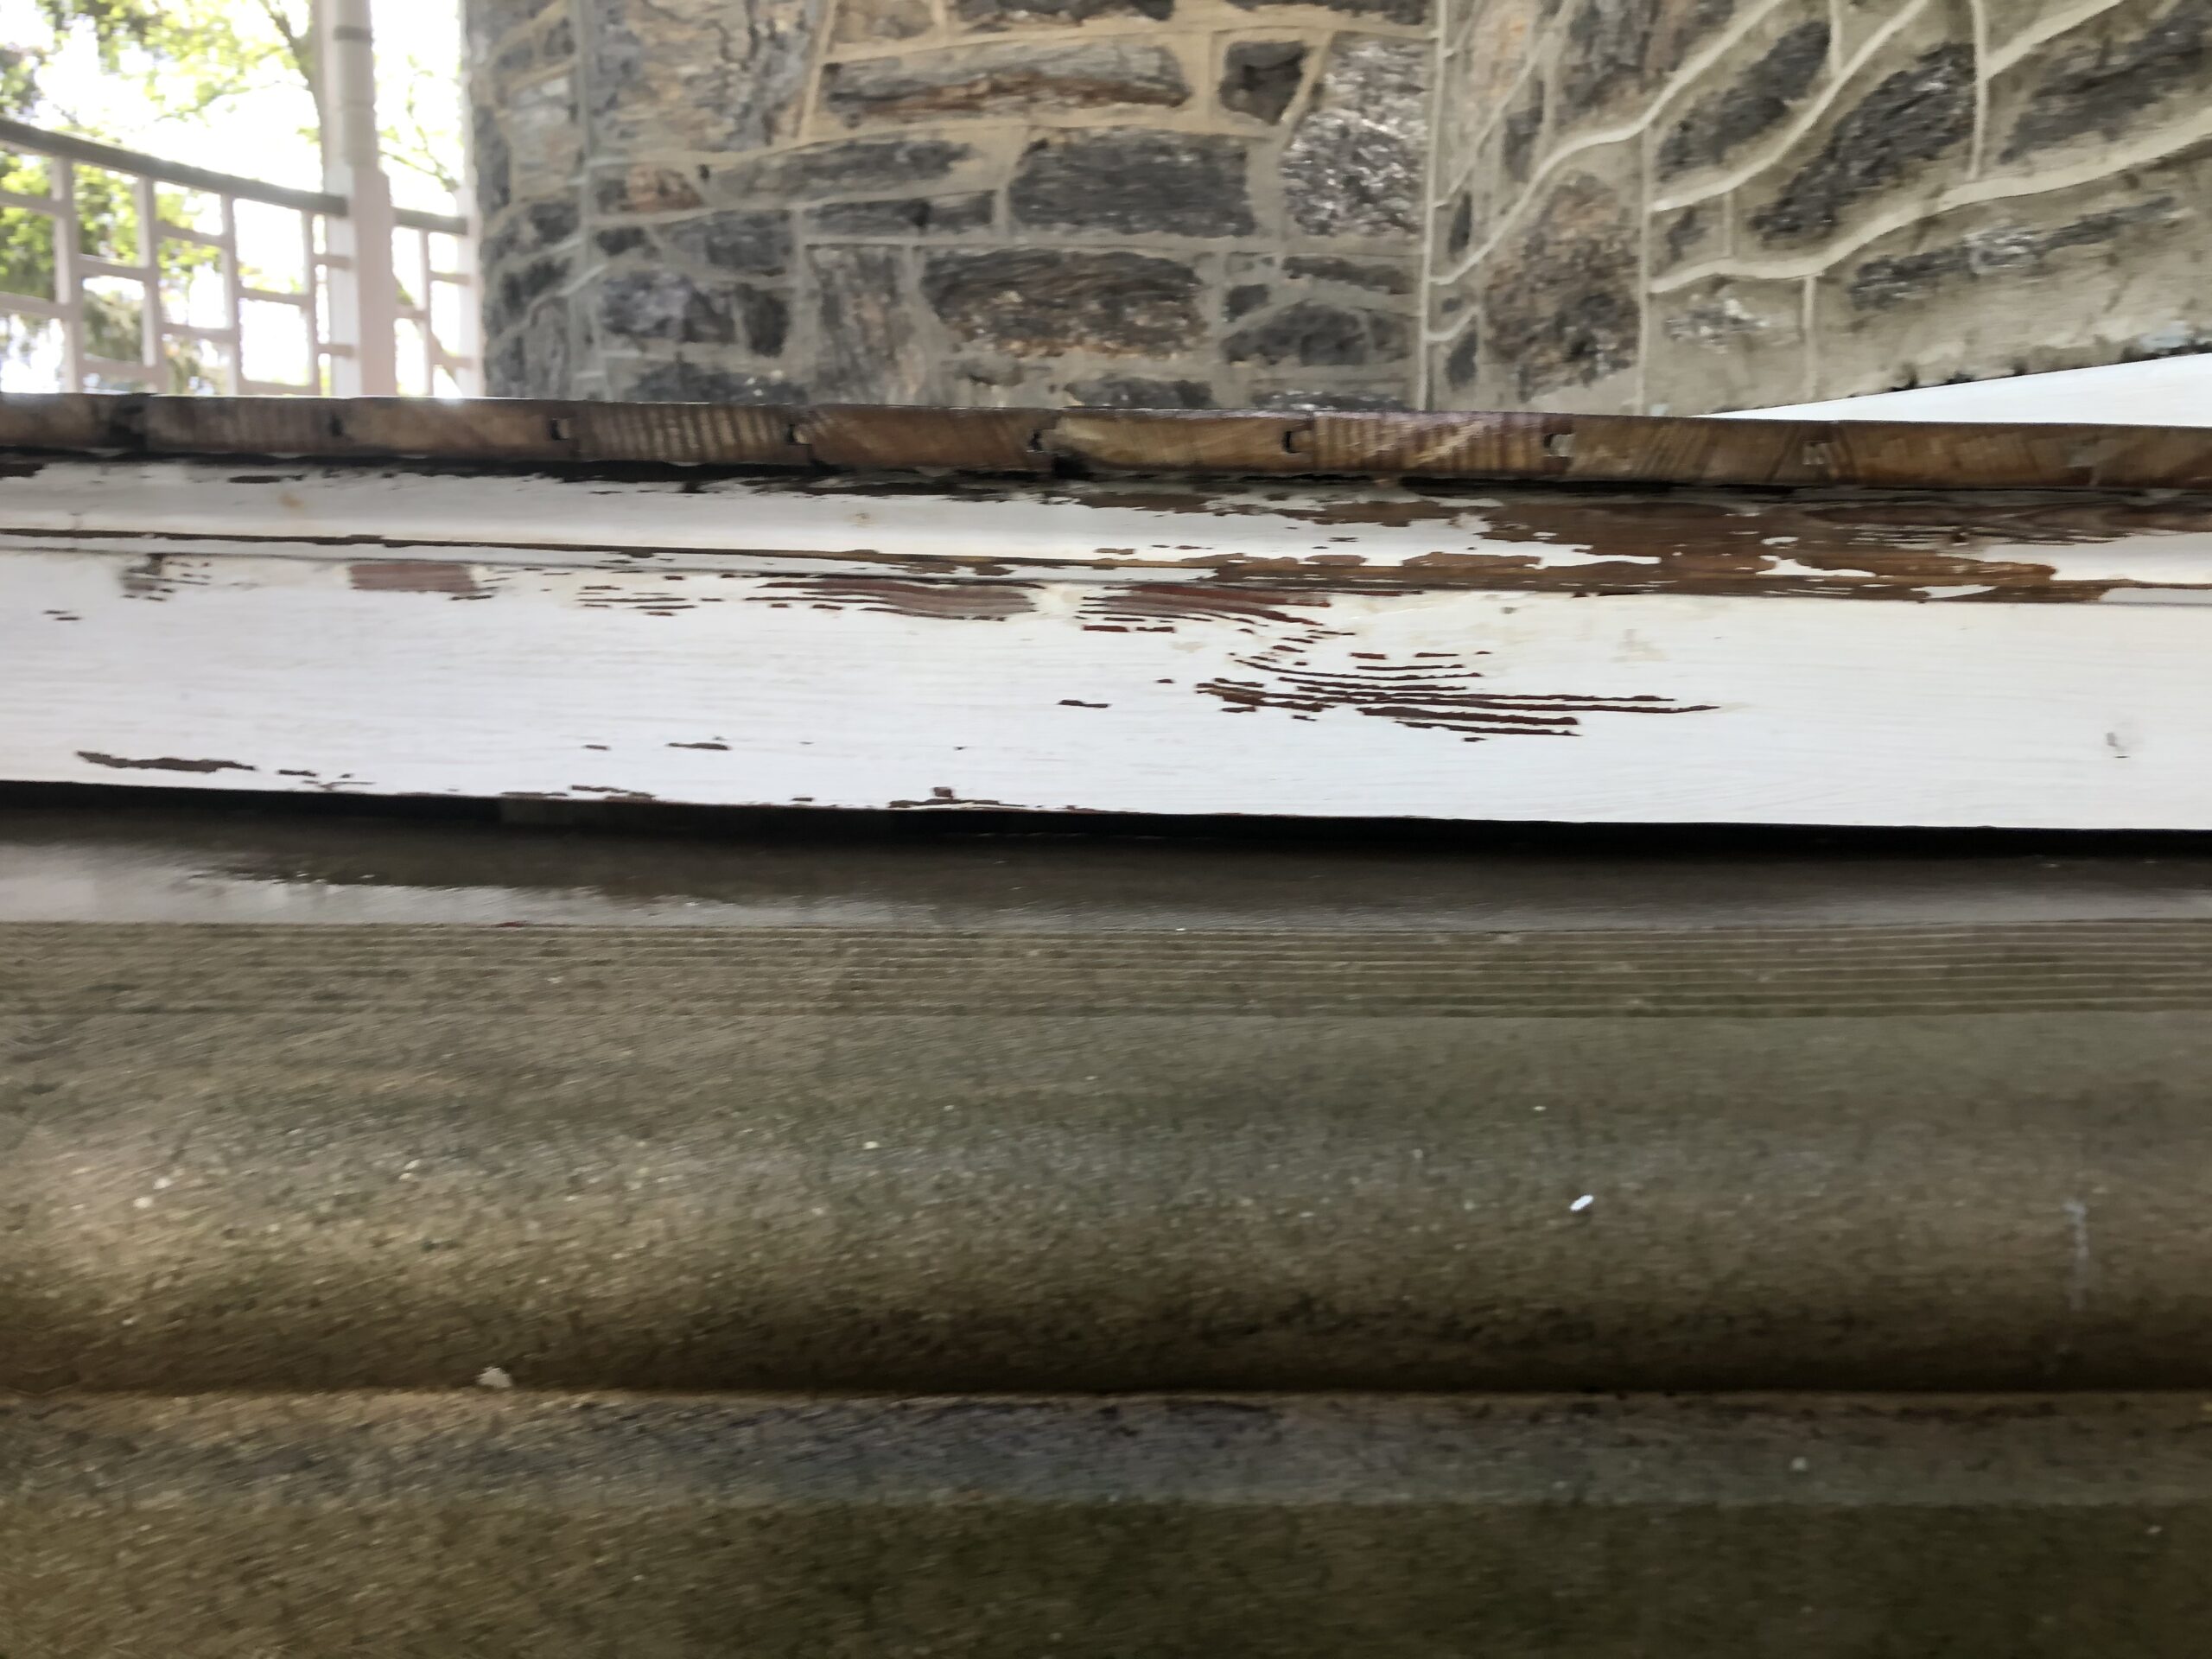
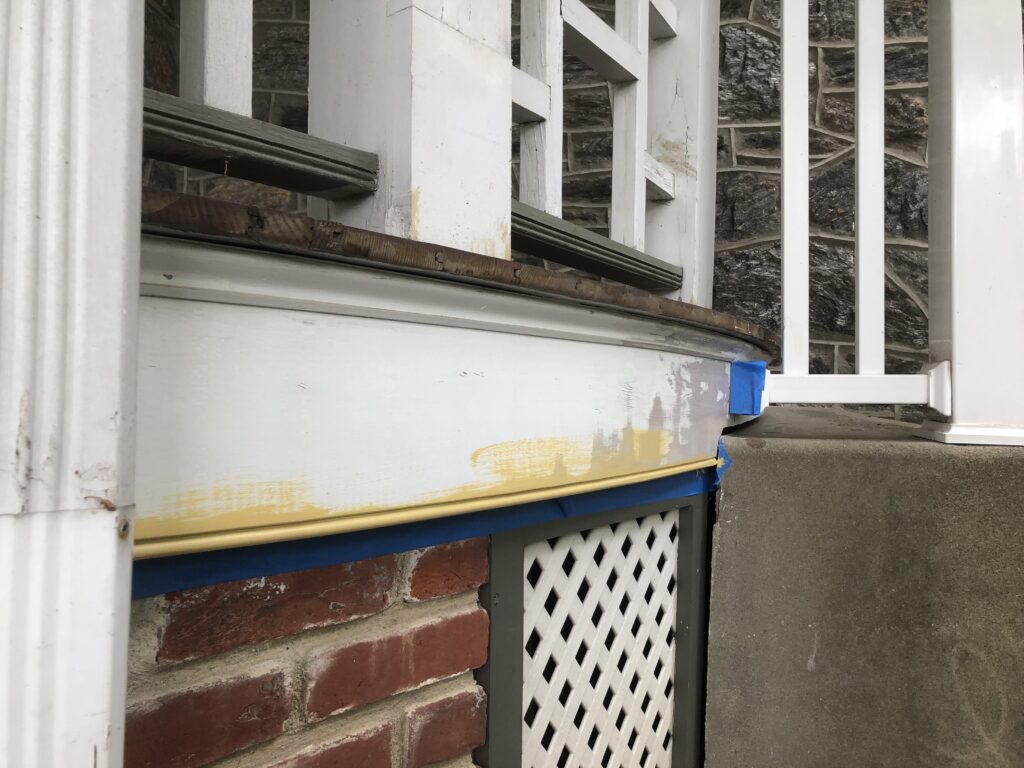
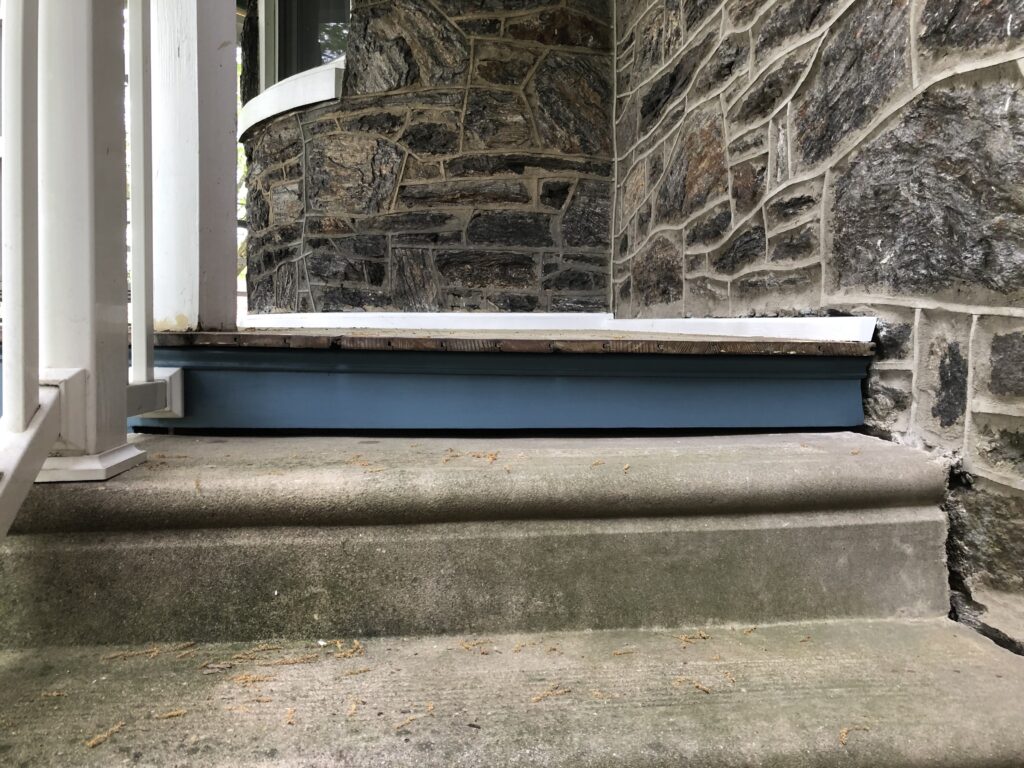
This year I am continuing the good fight against flaky paint. This particular paint is on the porch fascia board and skirt. Paint removal isn’t difficult here… just water the plants with a garden hose and the paint flakes right off! It is ridiculous how much of the paint is coming off this way.
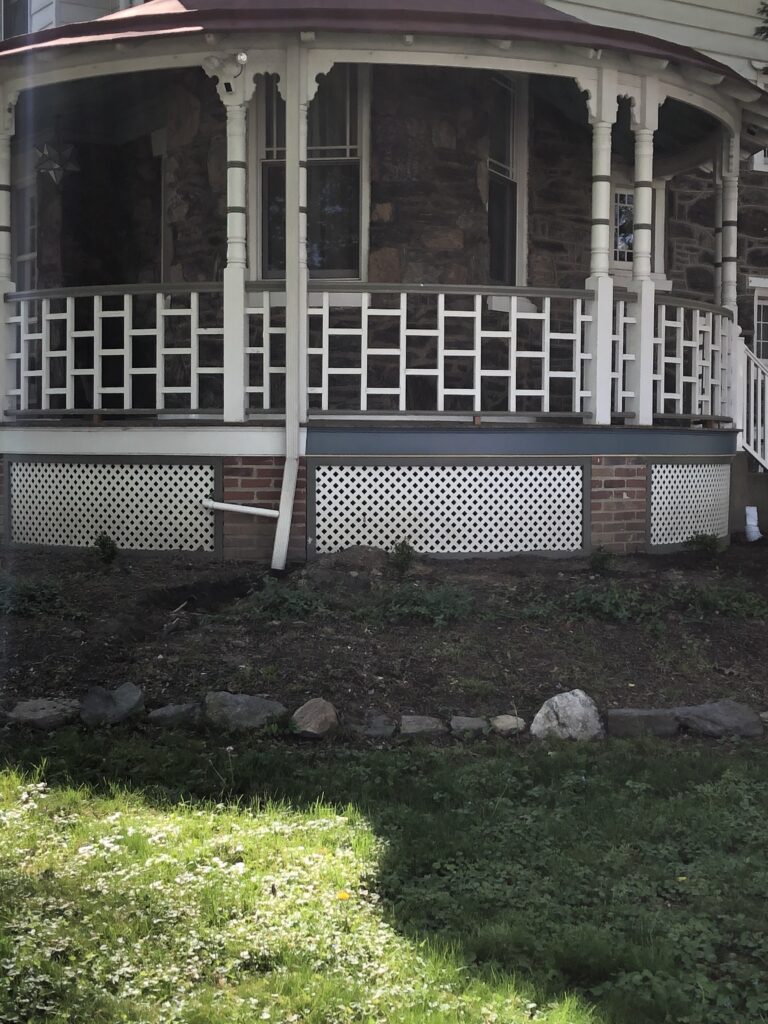
A little late night internet research led me to The Old House Guy and his page on porch skirting mistakes. The site is a treasure trove of ideas and resources, and when i read “The porch skirt should NOT be the focal point of your house or jump out at you for attention. Unfortunately this happens a lot today. Don’t believe me, drive around and see how your eyes are attracted to that white shinny plastic lattice with giant holes.” I almost fell out of my chair laughing, because I had always felt that the shinny white plastic lattice on this 1890 Queen Anne made her look like she should have wheels behind that lattice. As 2021 dawned, and I was out a little more, I started looking at porch skirting on other homes and was surprised how many of them were shiny white plastic, it seemed it was THE most popular choice.

I wasn’t thrilled with the diamond pattern lattice idea, the porch railing are squares, and I felt the lattice should mimic it. So I began to look for a square WOODEN lattice. Where does one acquire square wooden lattice during the apocalypse? The easy answer is you don’t! I looked online and in store (while safely staying away from people, wearing a mask, and smelling of hand sanitizer), and found nothing. Well nothing that was within my budget, I am not King Midas! Defeated, I pondered the idea of power washing the plastic and painting the frames (this was my low point). I knew, based on what I was reading on The Old House Guy website, that my lattice should have holes between 1 and 1.75 inches wide and wood slats that are 1.5 inches wide and 0.25 inches thick. But where was I to find this miracle?

More desperate late night internet trolling led me to the depot…where I discovered these pressure treated pine lath strips. They were 0.25 inches thick (check) and 1.5 inches wide (check). I felt like J. Thaddeus Toad, Esq. as a mania overtook me… I would build my own lattice!!! HAHAHAHAHAHAHAHA!
You should know, I am a Disney nerd, having worked at the store and the theme park… Wind in the Willows and Mr. Toad are just such a wonderful story about the consequences of excess.
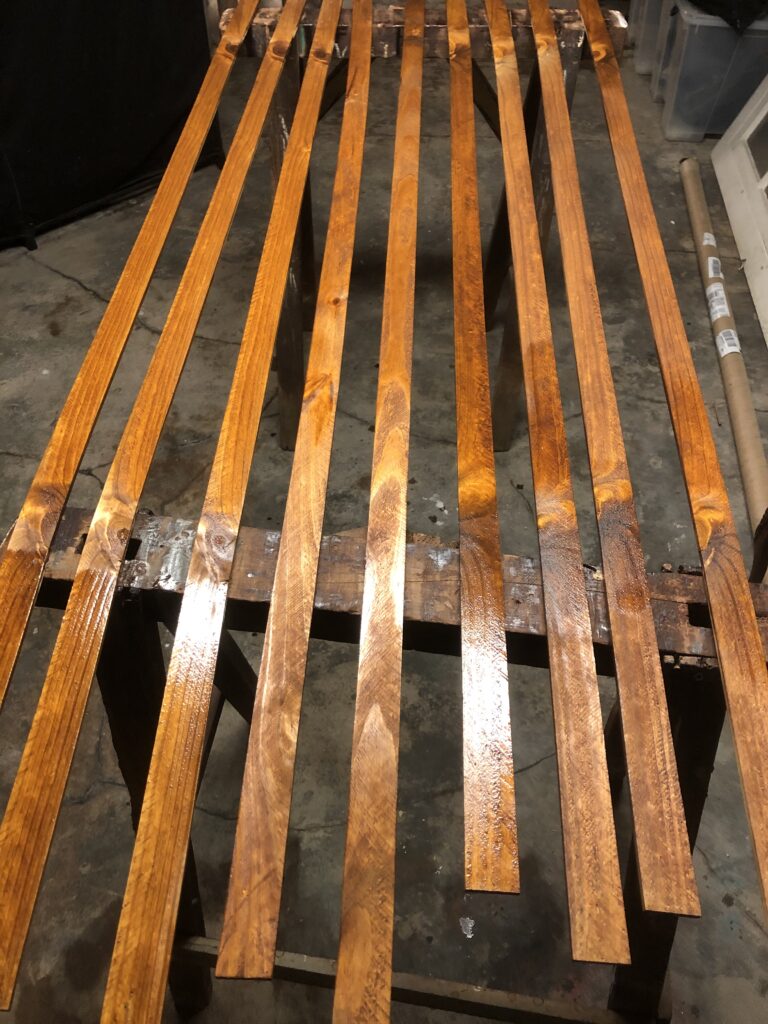
Hearing my idea, my husband rolled his eyes and said something disparaging, but my mania was in full swing and nothing was going to stop me! To show my resolve, I purchased a nail gun and 10 pieces of lattice and set to work. Of course, I was not going to throw pine lattice on the house… and painting it defeated the purpose of using wood, so I grabbed the left over Butternut Sikkens Proluxe Cetol SRD Translucent Stain from the porch (part 1) project, which gave the pressure treated pine lath a deep warm color.
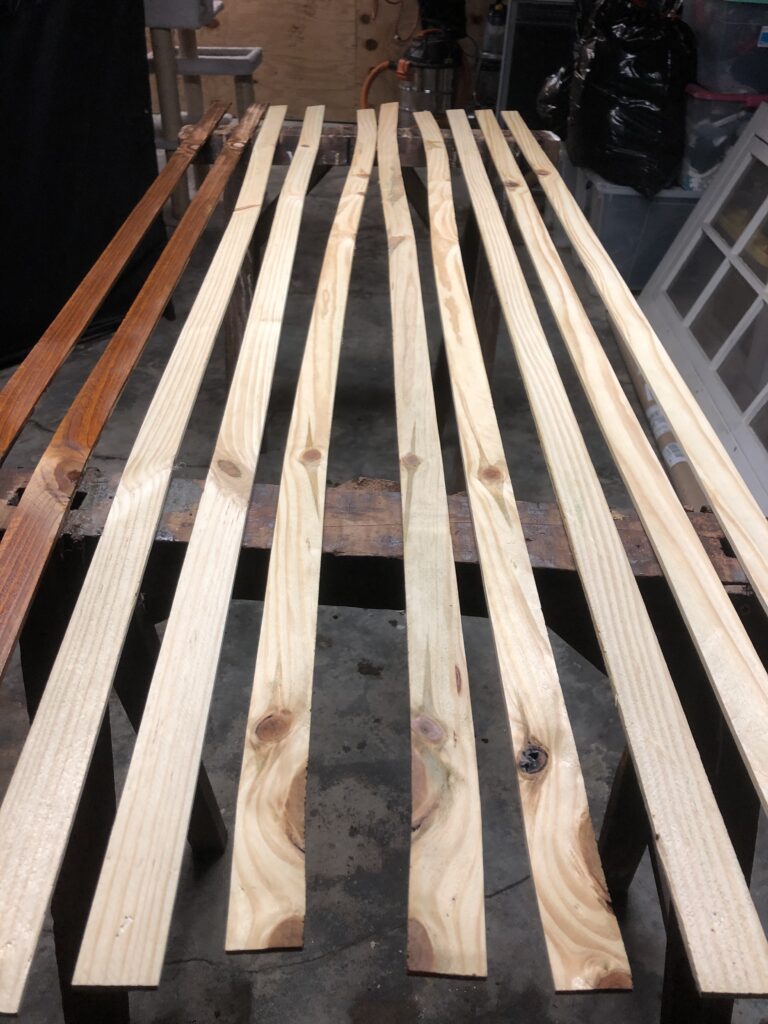
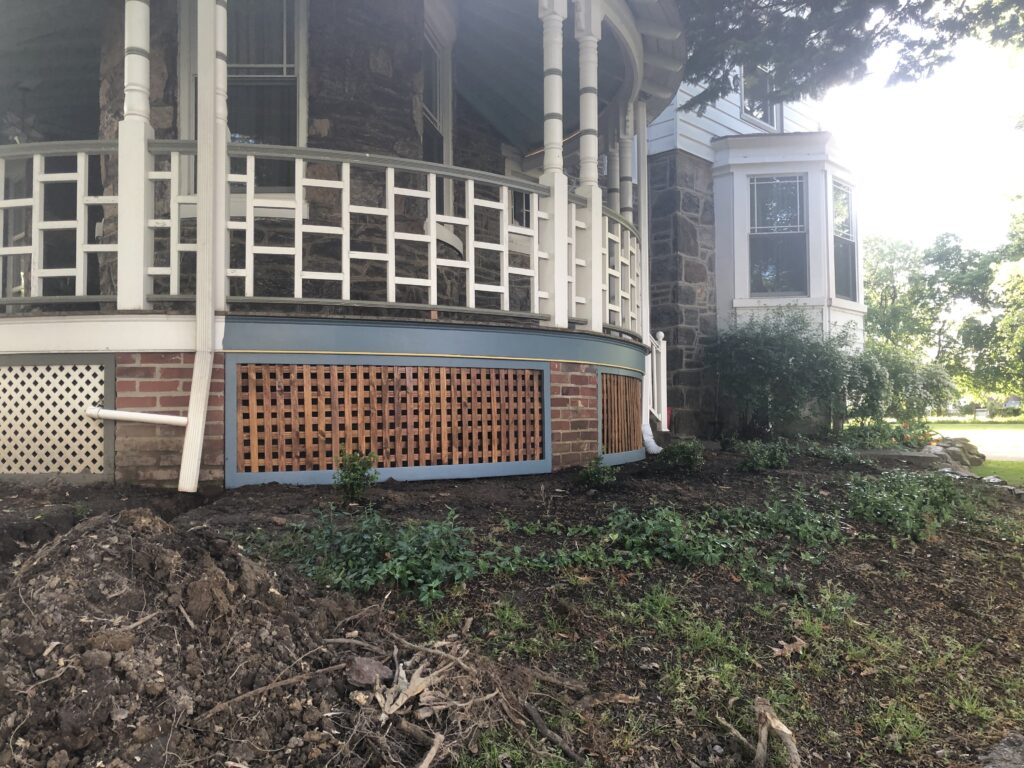
Not all of the pieces of lath are straight (as you can see from the photos), but having read the Home Depot reviews, and having picked them up from the store, I knew this. These are basically left over pieces of wood that lumber mills have and are cut into lath pieces so there is less waste (and the world needs less waste). And since I was going to cut most of them, I was content to cut around the curvy parts. For my test subject, I chose the small porch skirt next to the stairs (closest to the driveway entrance and in the shade most of the day).
I should mention that I have been house paint shopping for about 20 months… I have used Benjamin Moore’s Personal Color Viewer to upload a photo of the house and test out a variety of colors, then I purchased a few color samples from Samplize to see them in person. Samplize provides a 12×12 inch “peel and stick” color swatch of the color you select. It is actual paint, so the appearance is accurate to purchasing a sample can and painting. Having about 25 paint cans in the basement from the previous owner that I am slowly adding kitty litter to (to dry them out and dispose of them properly), I didn’t want to add to my work with a bunch of sample cans… so this idea seemed perfect to me. Each swatch was just under $6 (BM paint samples are $9) and I think I had a coupon for the first order.
House using BM Personal Color Viewer 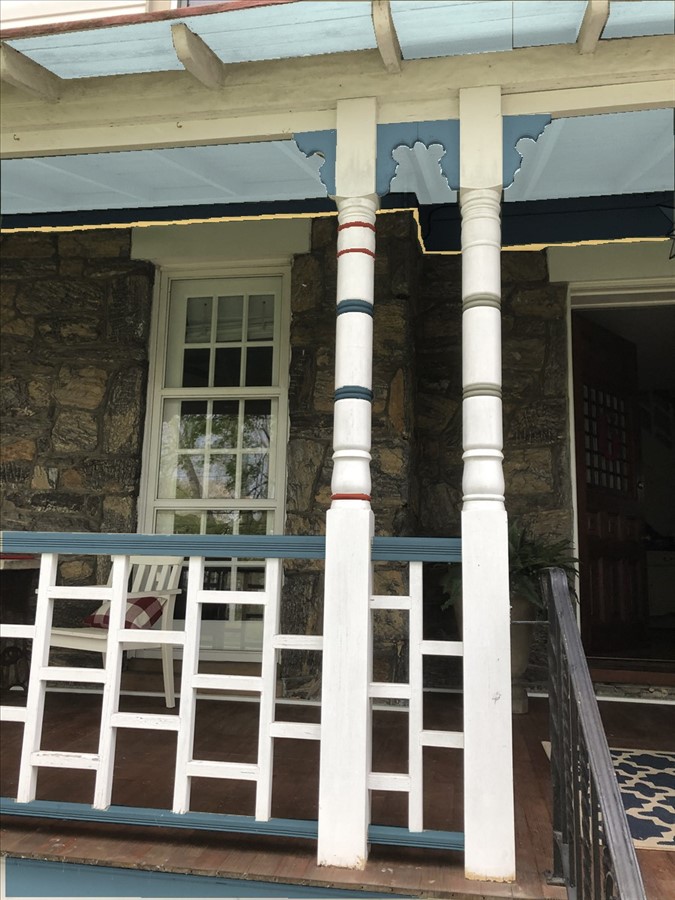
Railings using BM Personal Color Viewer
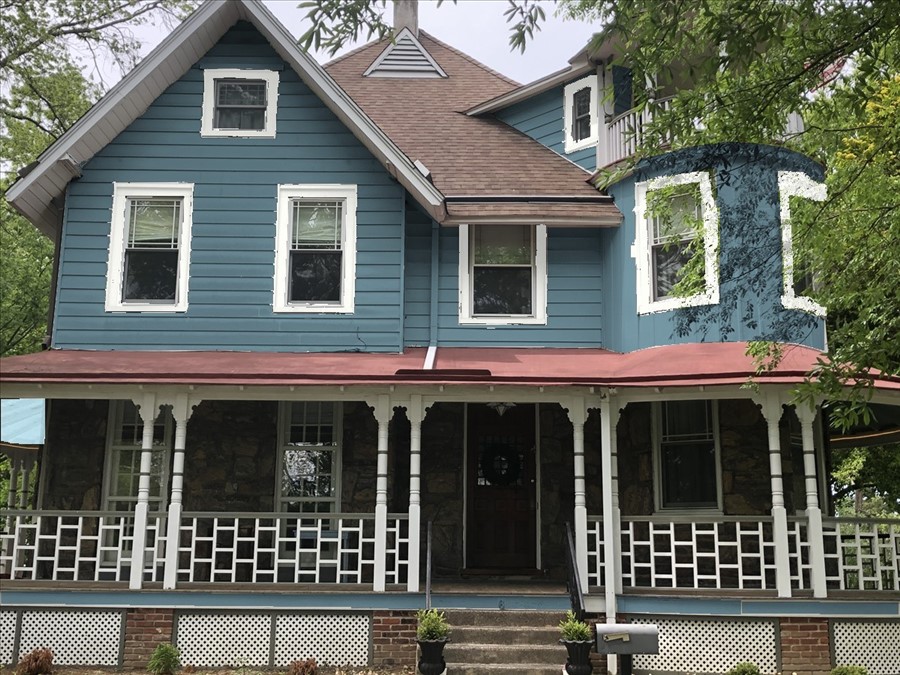
I chose a pallet of Philipsburg Blue (HC-159), Marblehead Gold (HC-11), and Terra Cotta Tile (2090-30). The blue is a soft and soothing color that I continued to be drawn back to….I had toyed with the idea of dark green, as I know from the work I have done on the house, dark green is one of the colors originally on the house, but there is a home three blocks away that is the exact twin, and she is green 🙁 The Marblehead Gold was chosen to bring out the yellow/gold of the stone and the Terra Cotta Tile to coordinate with the tin roof.
As I stated in the beginnings of this marathon post (sorry it feels really LONG), I was fighting the paint peel, and brothers and sisters, the struggle is real. I found this little gem at the depot and thought it might help where paint continues to peel even after rigorous sanding.
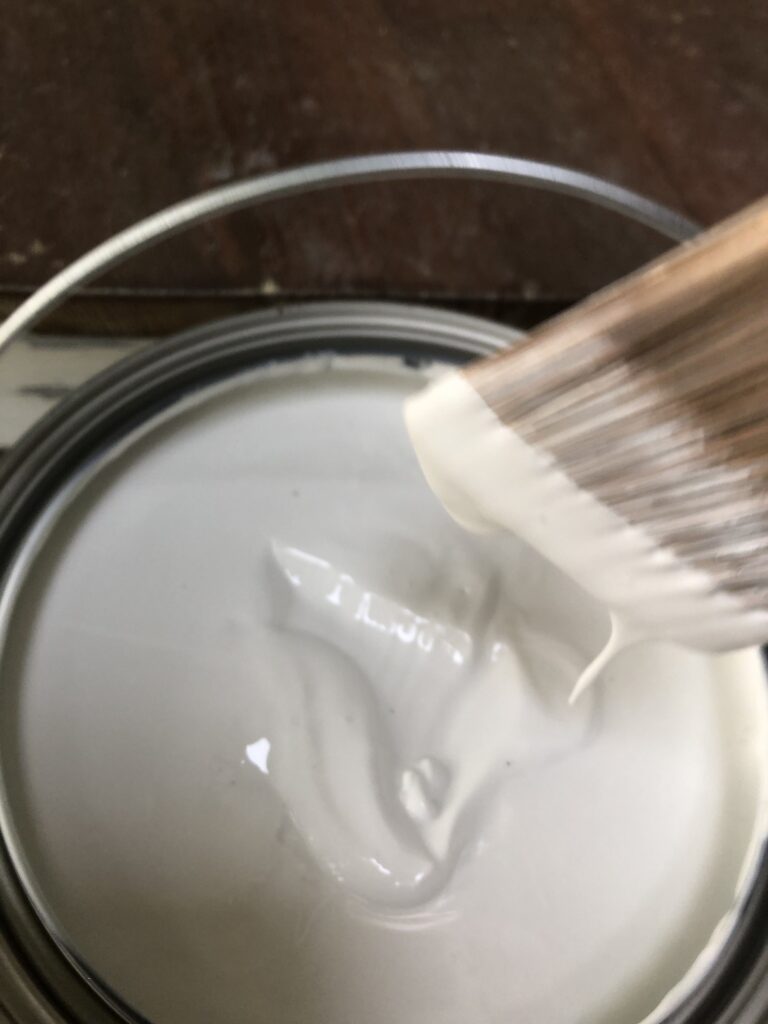

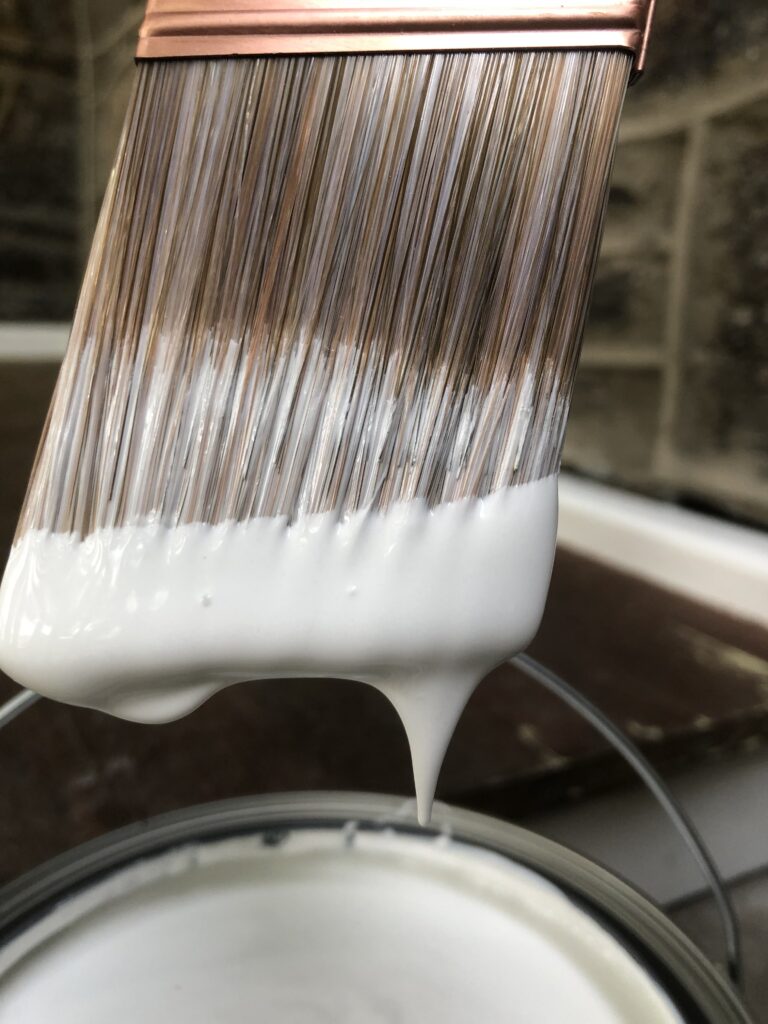
After two coats of the mayo primer, and two coats of paint, I stood back and was in utter awe! I find the color and the sheen (low luster) to be fantastic!!!!!


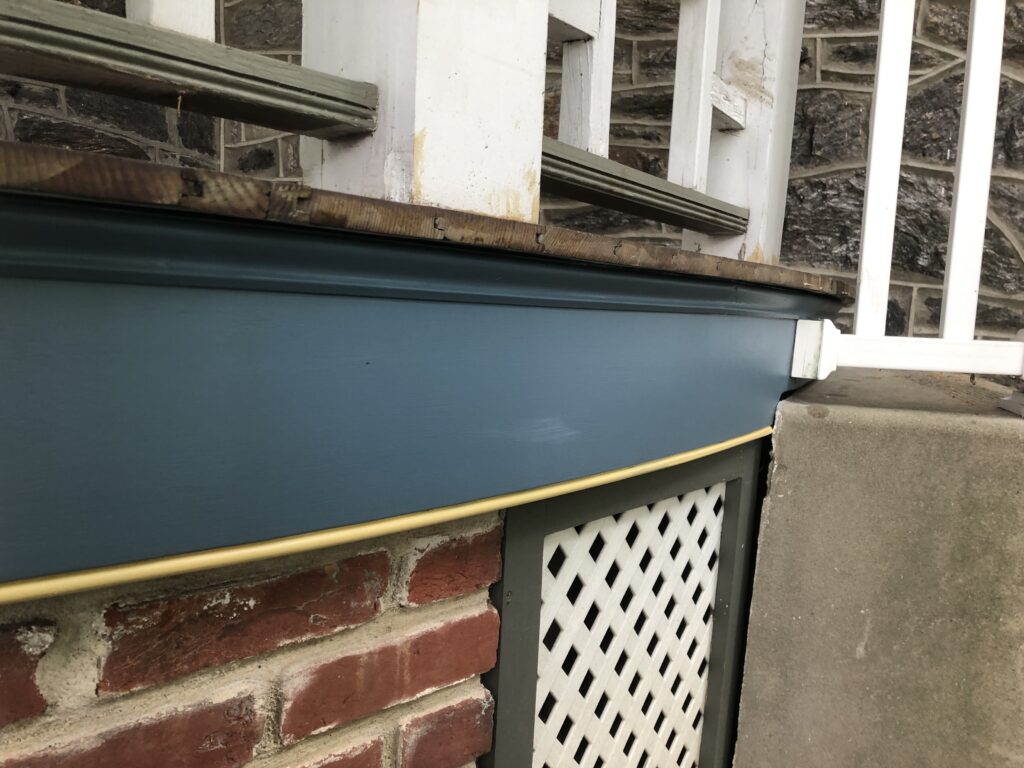
Enough OOOOOO-ing, back to my mania! After I had applied the Sikkens, I cut the lath pieces to length and nailed the pieces to the frame using a 1.25 inch spacer… I had mocked up both 1.5 and 1 inch, but neither looked right, so I met in the middle.


I am so embarrassed by my roots!
Ever the multi-tasker, I thought it a good time to fix the downspouts and bury some 4″ drainage pipe to move water away from the house, so I am digging up tree roots that have invaded the flower bed. I worked out a lot of aggression with my shovel on those roots! The gutter on the tin roof collects a lot of leaves and pollen, which clogged all previous attempts to relocate the water away from the house. So I have “modified” the Flex Grate White Downspout Filter based on the helpful reviews of others to prevent clogging and allow for an easy movement of water and debris. I cut off the little “lip” at the opening and added small chicken wire/fence to the inside to eliminate small items from dropping down. We have had one large rainstorm since installation, and it really did work well. I had to clean out the opening with my hand after the rain, but very little debris made its way into the pipe, which was the goal of this detour.
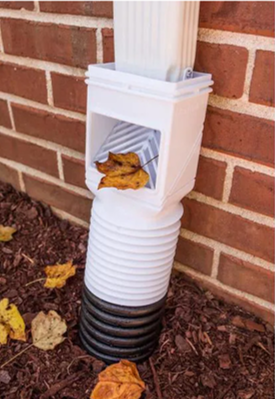
From the manufacturer 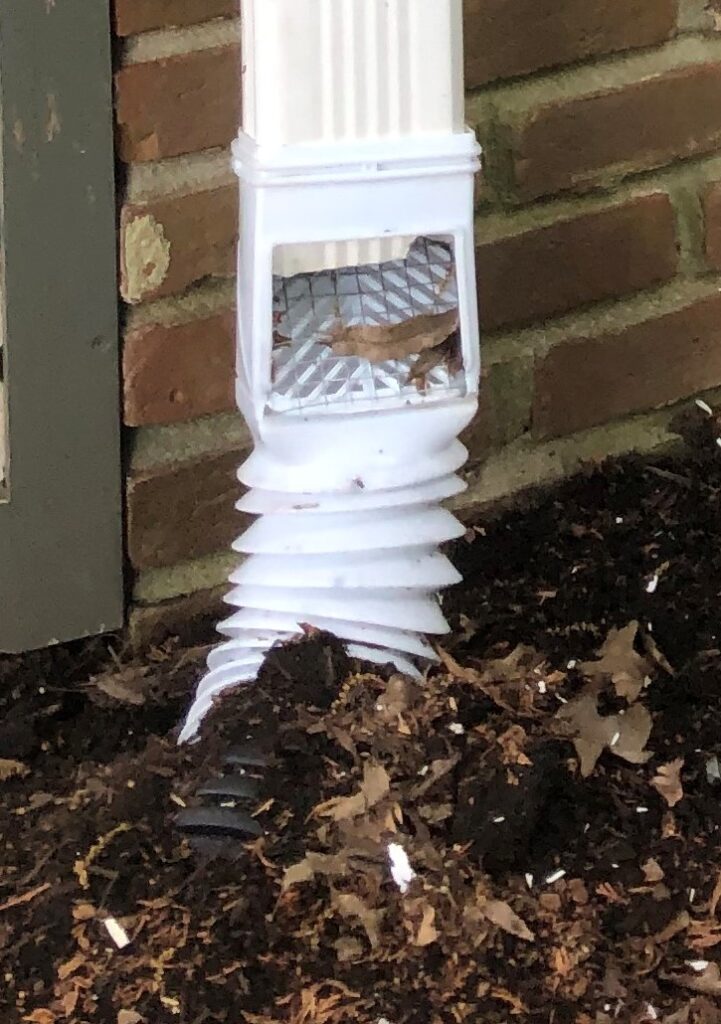
My modification
I am about half way done with painting the fascia board, digging the drainage pipe holes, and the porch skirting. My goal is to have the porch fascia and skirting complete before mid-June, when I am scheduled to go back into the office. That is just three short weeks away, so I had better make the most of my time (or the time I am currently saving in commuting) and finish this portion of the project. I plan to work on the porch railings a little section at a time during the summer evenings and weekends and hopefully before the first snow flake (or wintery mix) of the season arrives I will have made a dent in the porch railings. Of course, all of them require sanding, bondo, and paint, which might hinder a quick (fall) finish.
Standing back and looking at the progress, the section I have completed is definitely not the focal point of the house and doesn’t jump out at you for attention like the unfinished side. The grass growing in my flowerbeds is another story (don’t get me started!). I am so very happy with the portion I have done, and cannot wait to have her finished… sometimes she kicks me in the head, but the pain is worth bringing a little beauty and respect back to the Good House.
Stay Safe!
