
The IKEA Showroom
One sunny afternoon I walked through my son’s room and stopped dead in my tracks, I looked around and could not find one piece of furniture in his room that wasn’t from the Swedish multinational conglomerate…I kick myself now for not taking a photo and uploading it to the IKEA website as an advertisement. The bed, mattress, nightstand, dresser, bookcase, and toy storage… all IKEA. The only thing not Swedish in nature was the second hand train table (thank God for that thing!). So, what is a mommy to do??? I turned to my new favorite obsession, Facebook Marketplace.
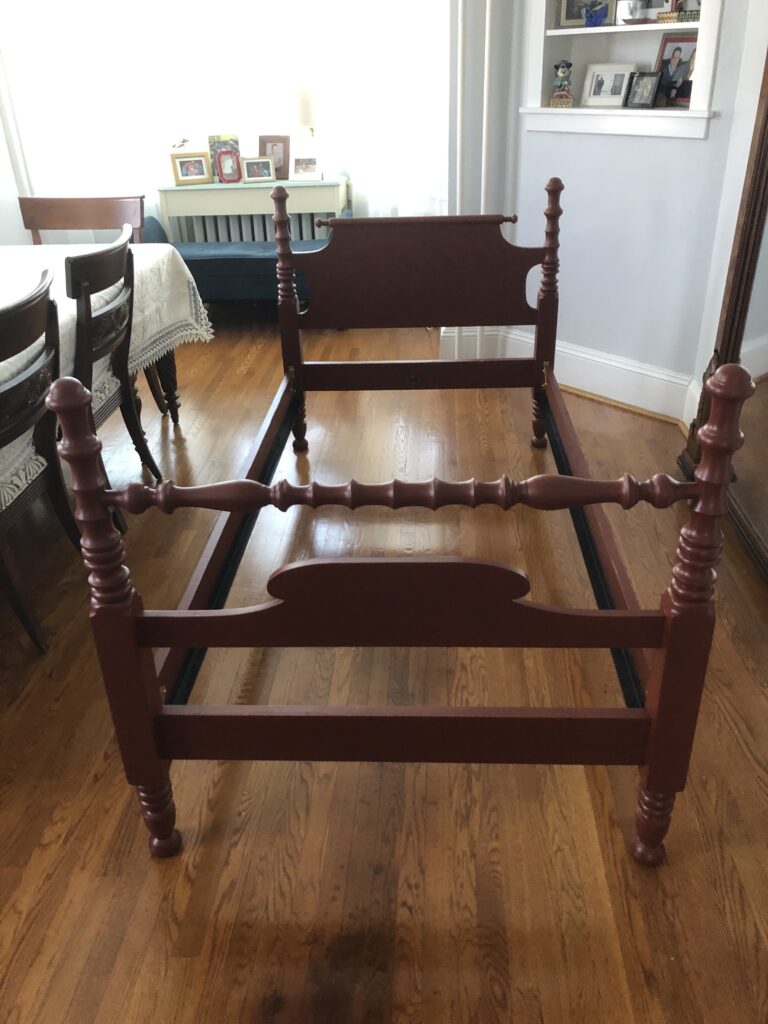
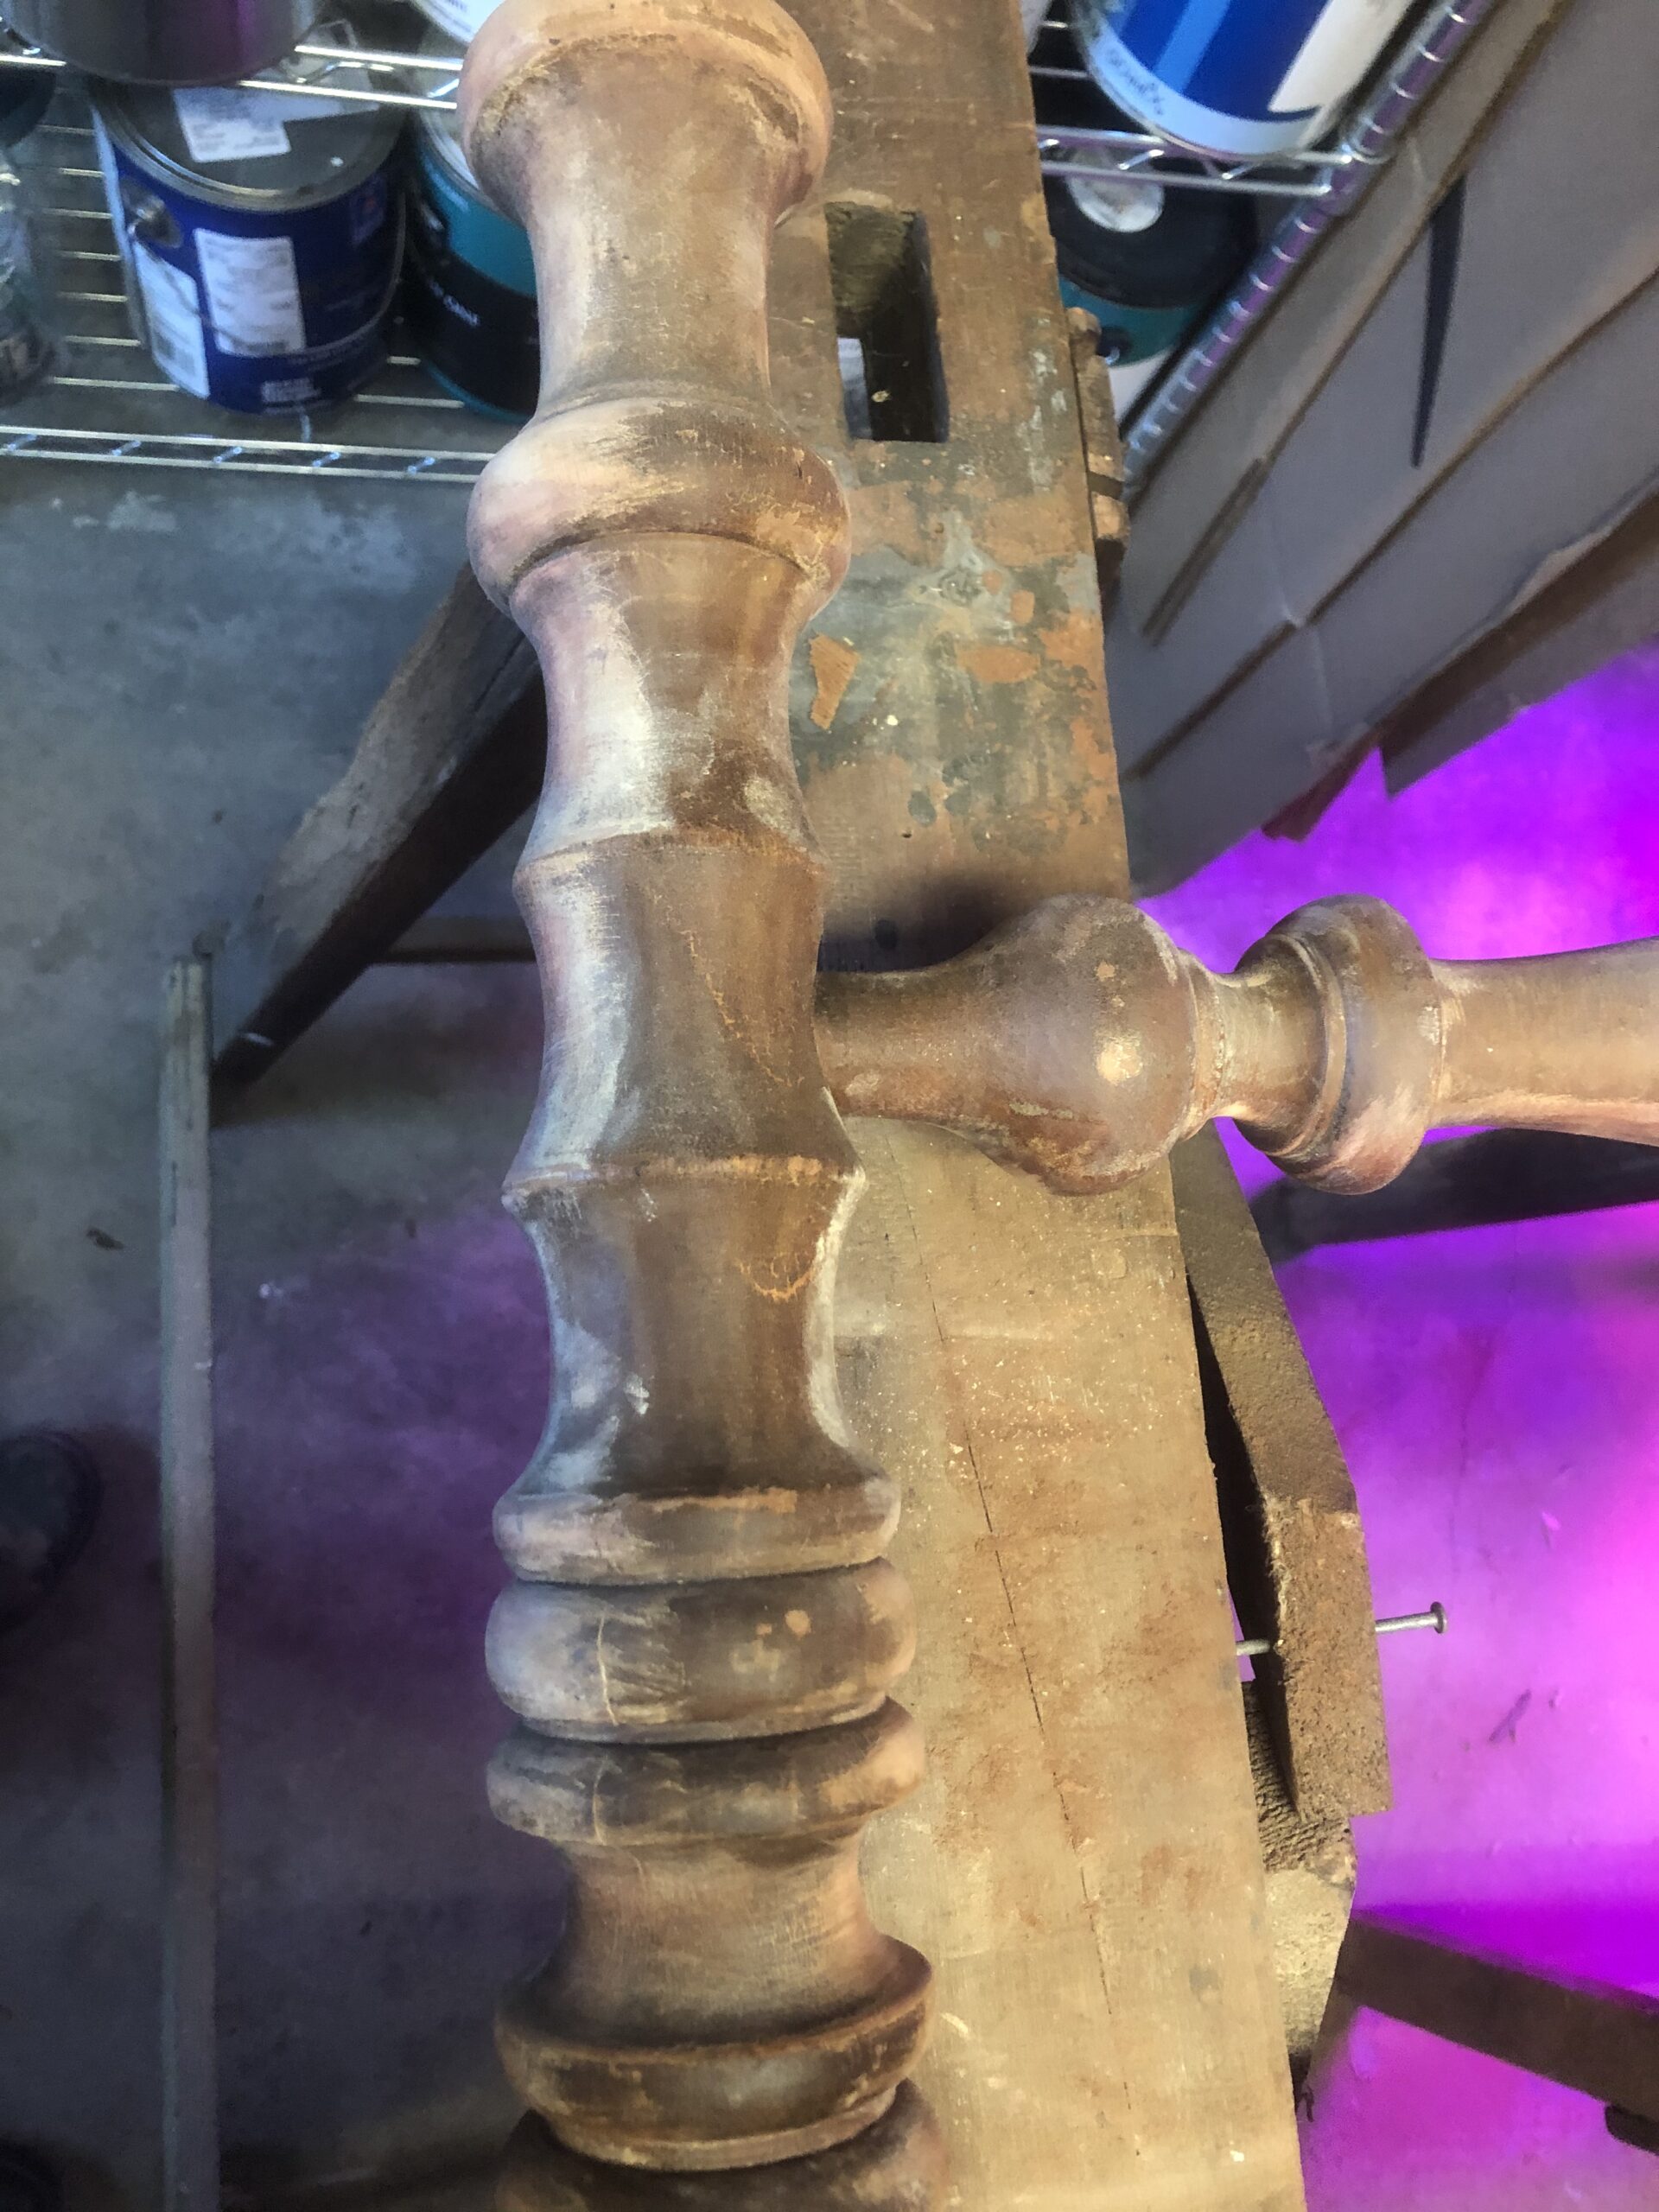
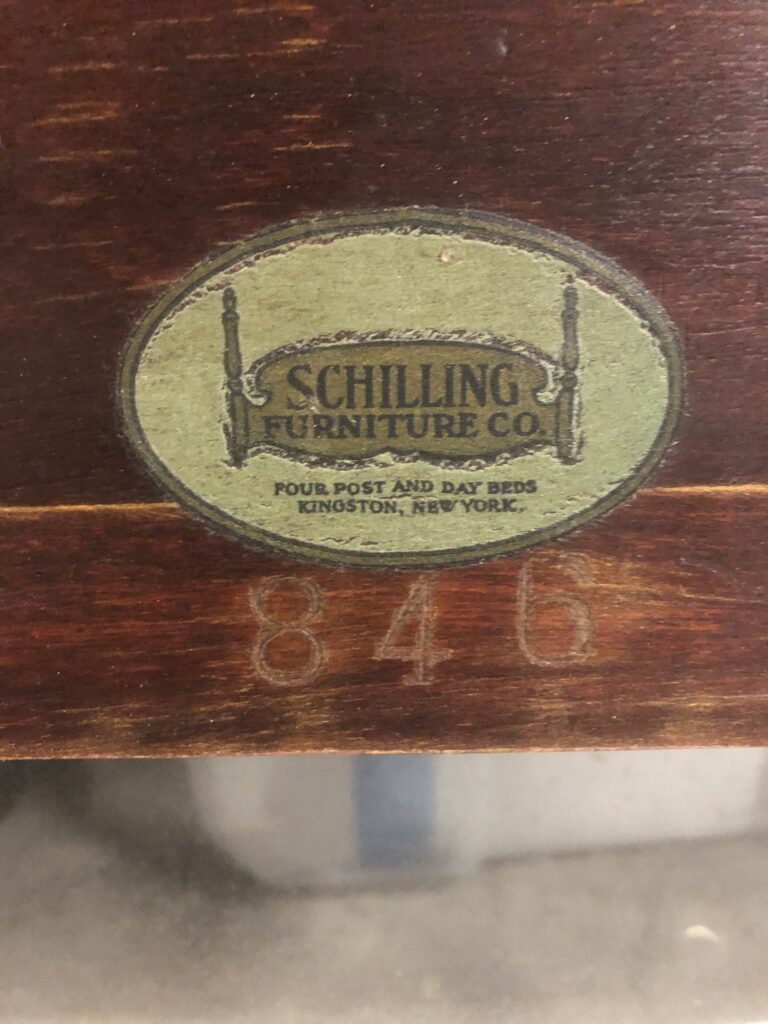
I started with the bed, thinking that it was time (he is now 5 years old) to provide him a solid bed and a new mattress. He continues to instruct me that I should paint his room red (his favorite color), but I simply cannot bring myself to do that, so instead, I negotiated with the tiny terrorist told him I would paint his bed red. This Schilling Furniture Company twin bed was manufactured in Kingston, New York and still retains the manufacturers mark on the headboard. Probably produced between 1930 and 1940, the veneer had seen better days, in fact the outer foot board veneer broke apart like rice paper once I got it home and onto the saw horses. So I had no reservations about painting the little thing.
After a little research on furniture painting, i decided on using a Milk Paint. Milk paint is a nontoxic water-based paint. It can be made from milk and lime, generally with pigments added for color. Milk paint was used for years before the invention of oil and latex, and since it is nontoxic, it makes it the perfect solution for painting my child’s furniture. In today’s era of HGTV convincing everyone that they are an interior designer (cause what else do you do on a Sunday morning???) Milk paint has become synonymous with chippy and distressed furniture. But in my home, furniture is taken care of and I don’t use chicken wire in any of my design choices (Philly is not a farm, there are no chickens here). For me furniture refinishing is extending the life of the piece, making it pretty again, and giving it a place to shine for another 100 years. So prep work (while not HGTV worthy) is essential.

First order of prep work was the peeling veneer, that was glued and clamped. The veneer that couldn’t be saved was removed and I used Bondo Wood Filler (not just for your 57 Chevy!) to correct any holes or missing veneer pieces. This stuff is as hard as nails when dry and does not shrink… but it smells to high heaven, so VENTILATE and don’t operate heavy machinery immediately after. Next, I sanded until I had no fingerprints, which was convenient for my convenient store robbery I was planning. Finally it was time to paint! I used Shackteau Interiors Tuck’s Red as the color, it is a deep rich red, not so fire-trucky and toddler like. I am not a “chippy”, “shabby”, or “distressed” type of gal, so I used the Schackteau Interiors Extra Bond agent, which helps the paint adhere to the surface. I knew I would need a paint that would stand up to an active little boy and be easily wiped down if when accidents occur. Thank heaven for Shackateau Interiors Facebook videos, I watched at least 10 of them to feel comfortable mixing the paint powder, water, and bonding agent. Finally to seal the paint I used the Shackteau Interiors Hemp Oil. Again, this natural protector will need to be reapplied in a few years will not put chemicals next to his little body, and will protect the finish of the piece.
manufacturers mark 
sellers mark 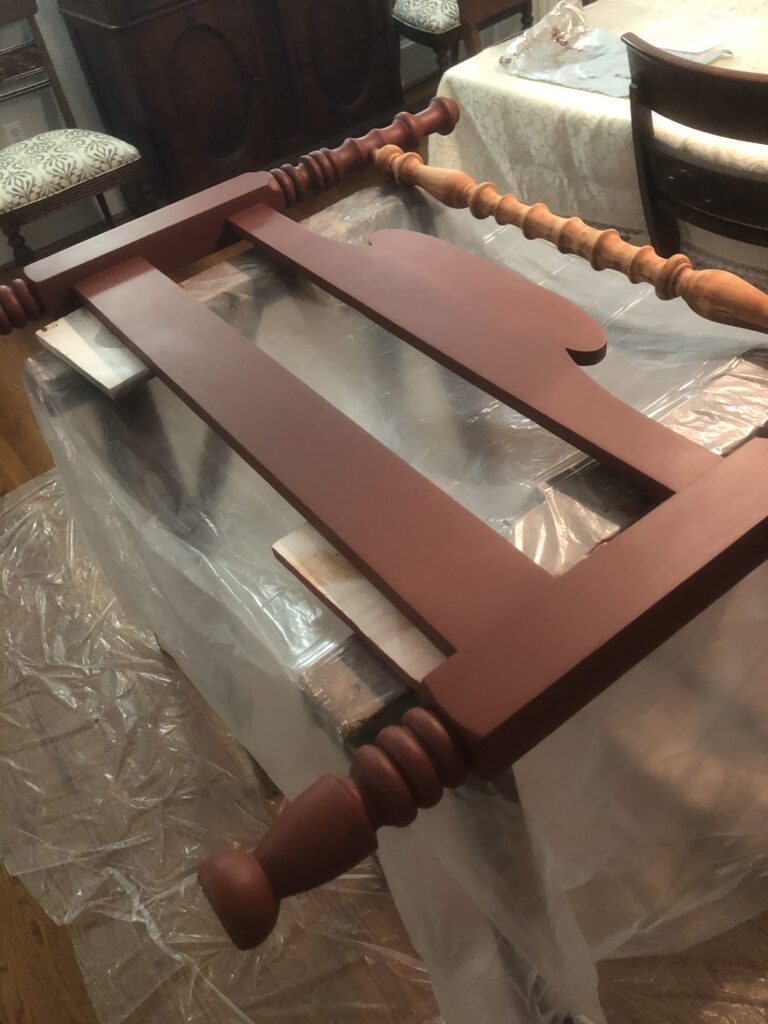
painting in the dining room 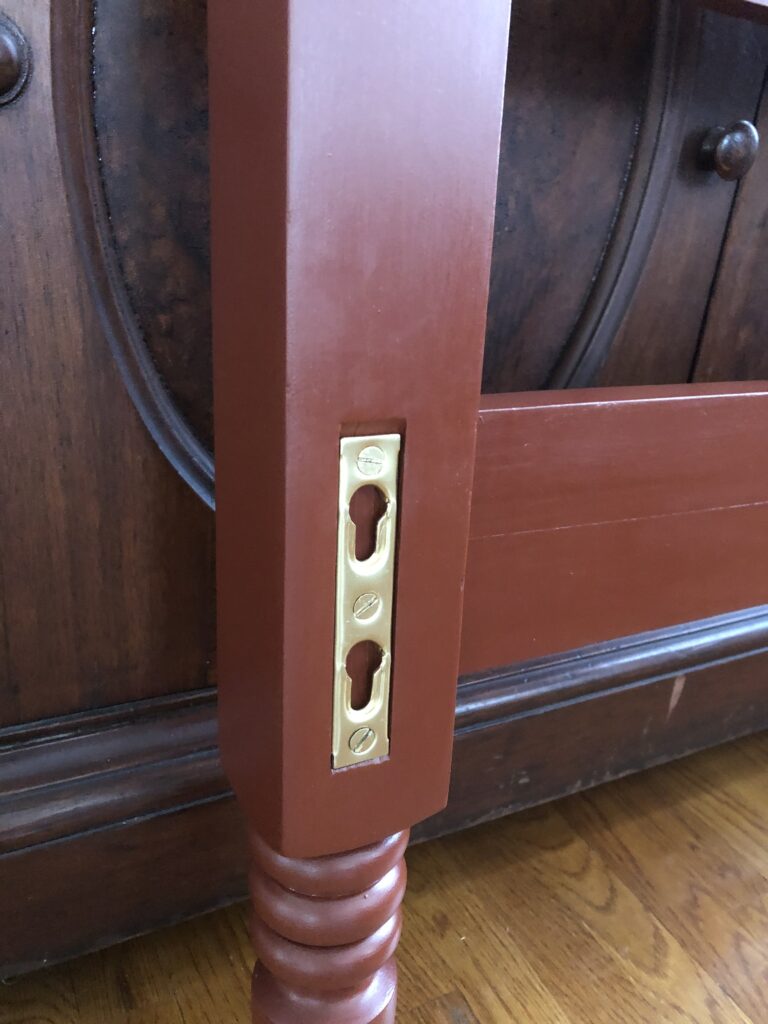
painted hardware (eliminating rust) 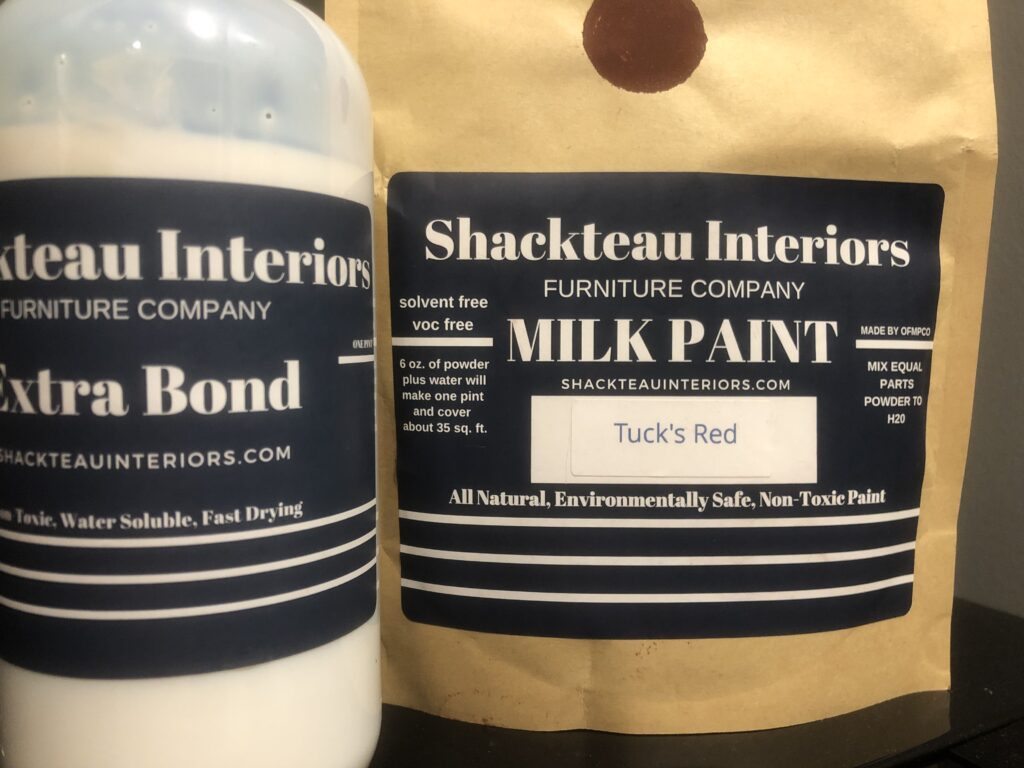
Shacteau Interiors paint 
completed footboard 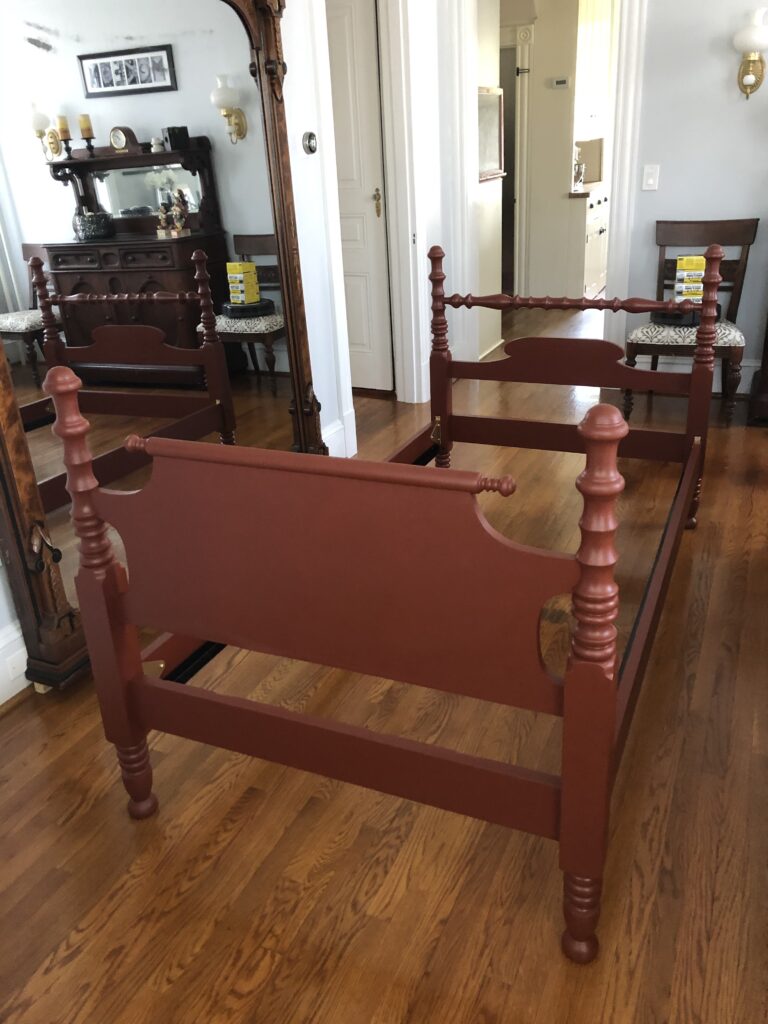
Completed project


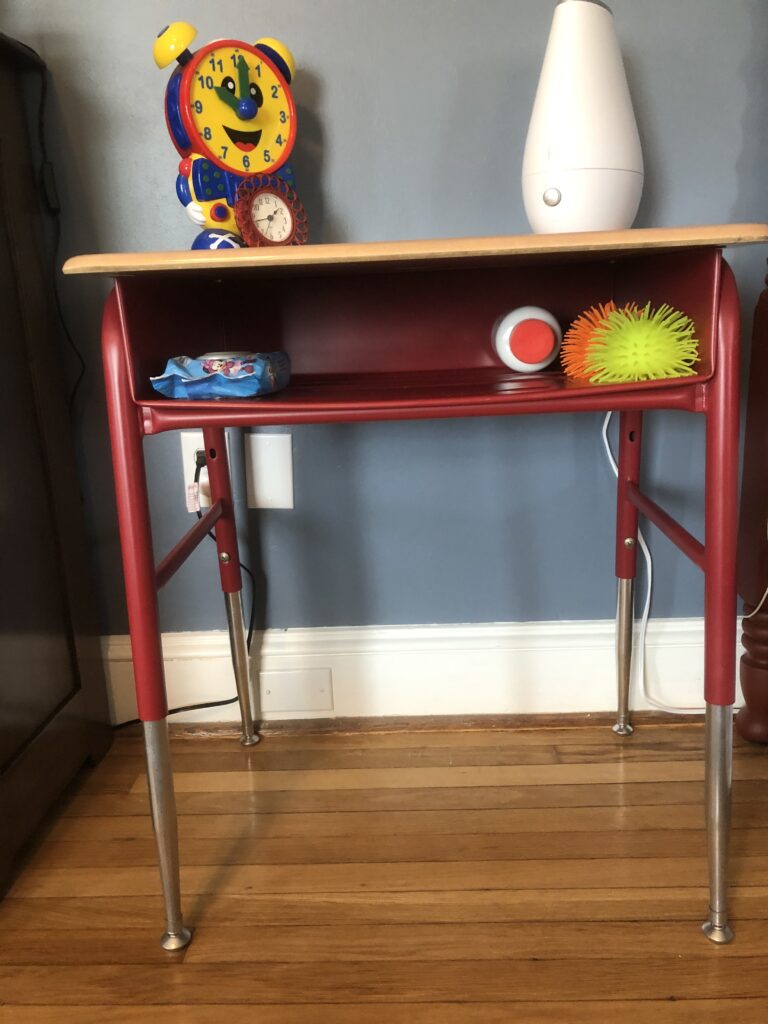
A child’s nightstand must withstand many things…and I am sorry to say that the IKEA piece had seen better days, the poor top was starting to peel from all of the filth and spills. I didn’t feel right subjecting another piece of furniture to its fate, and while perusing Pinterst in the dead of night, an idea solidified. I would find a school desk! I mean, if a school desk can handle thousands of dirty children, it should be able to handle this one. Of course the Marketplace had one (you can buy anything on there!), made of metal and plastic… PERFECT!!! Of course the tiny terrorist needed it to be red, so I took it apart, scrubbed and buffed, then spray painted it red (it almost matches the bed). Easy, peasy, lemon, squeezy… well it took a week due to weather and not being able to spray paint in the basement 🙁
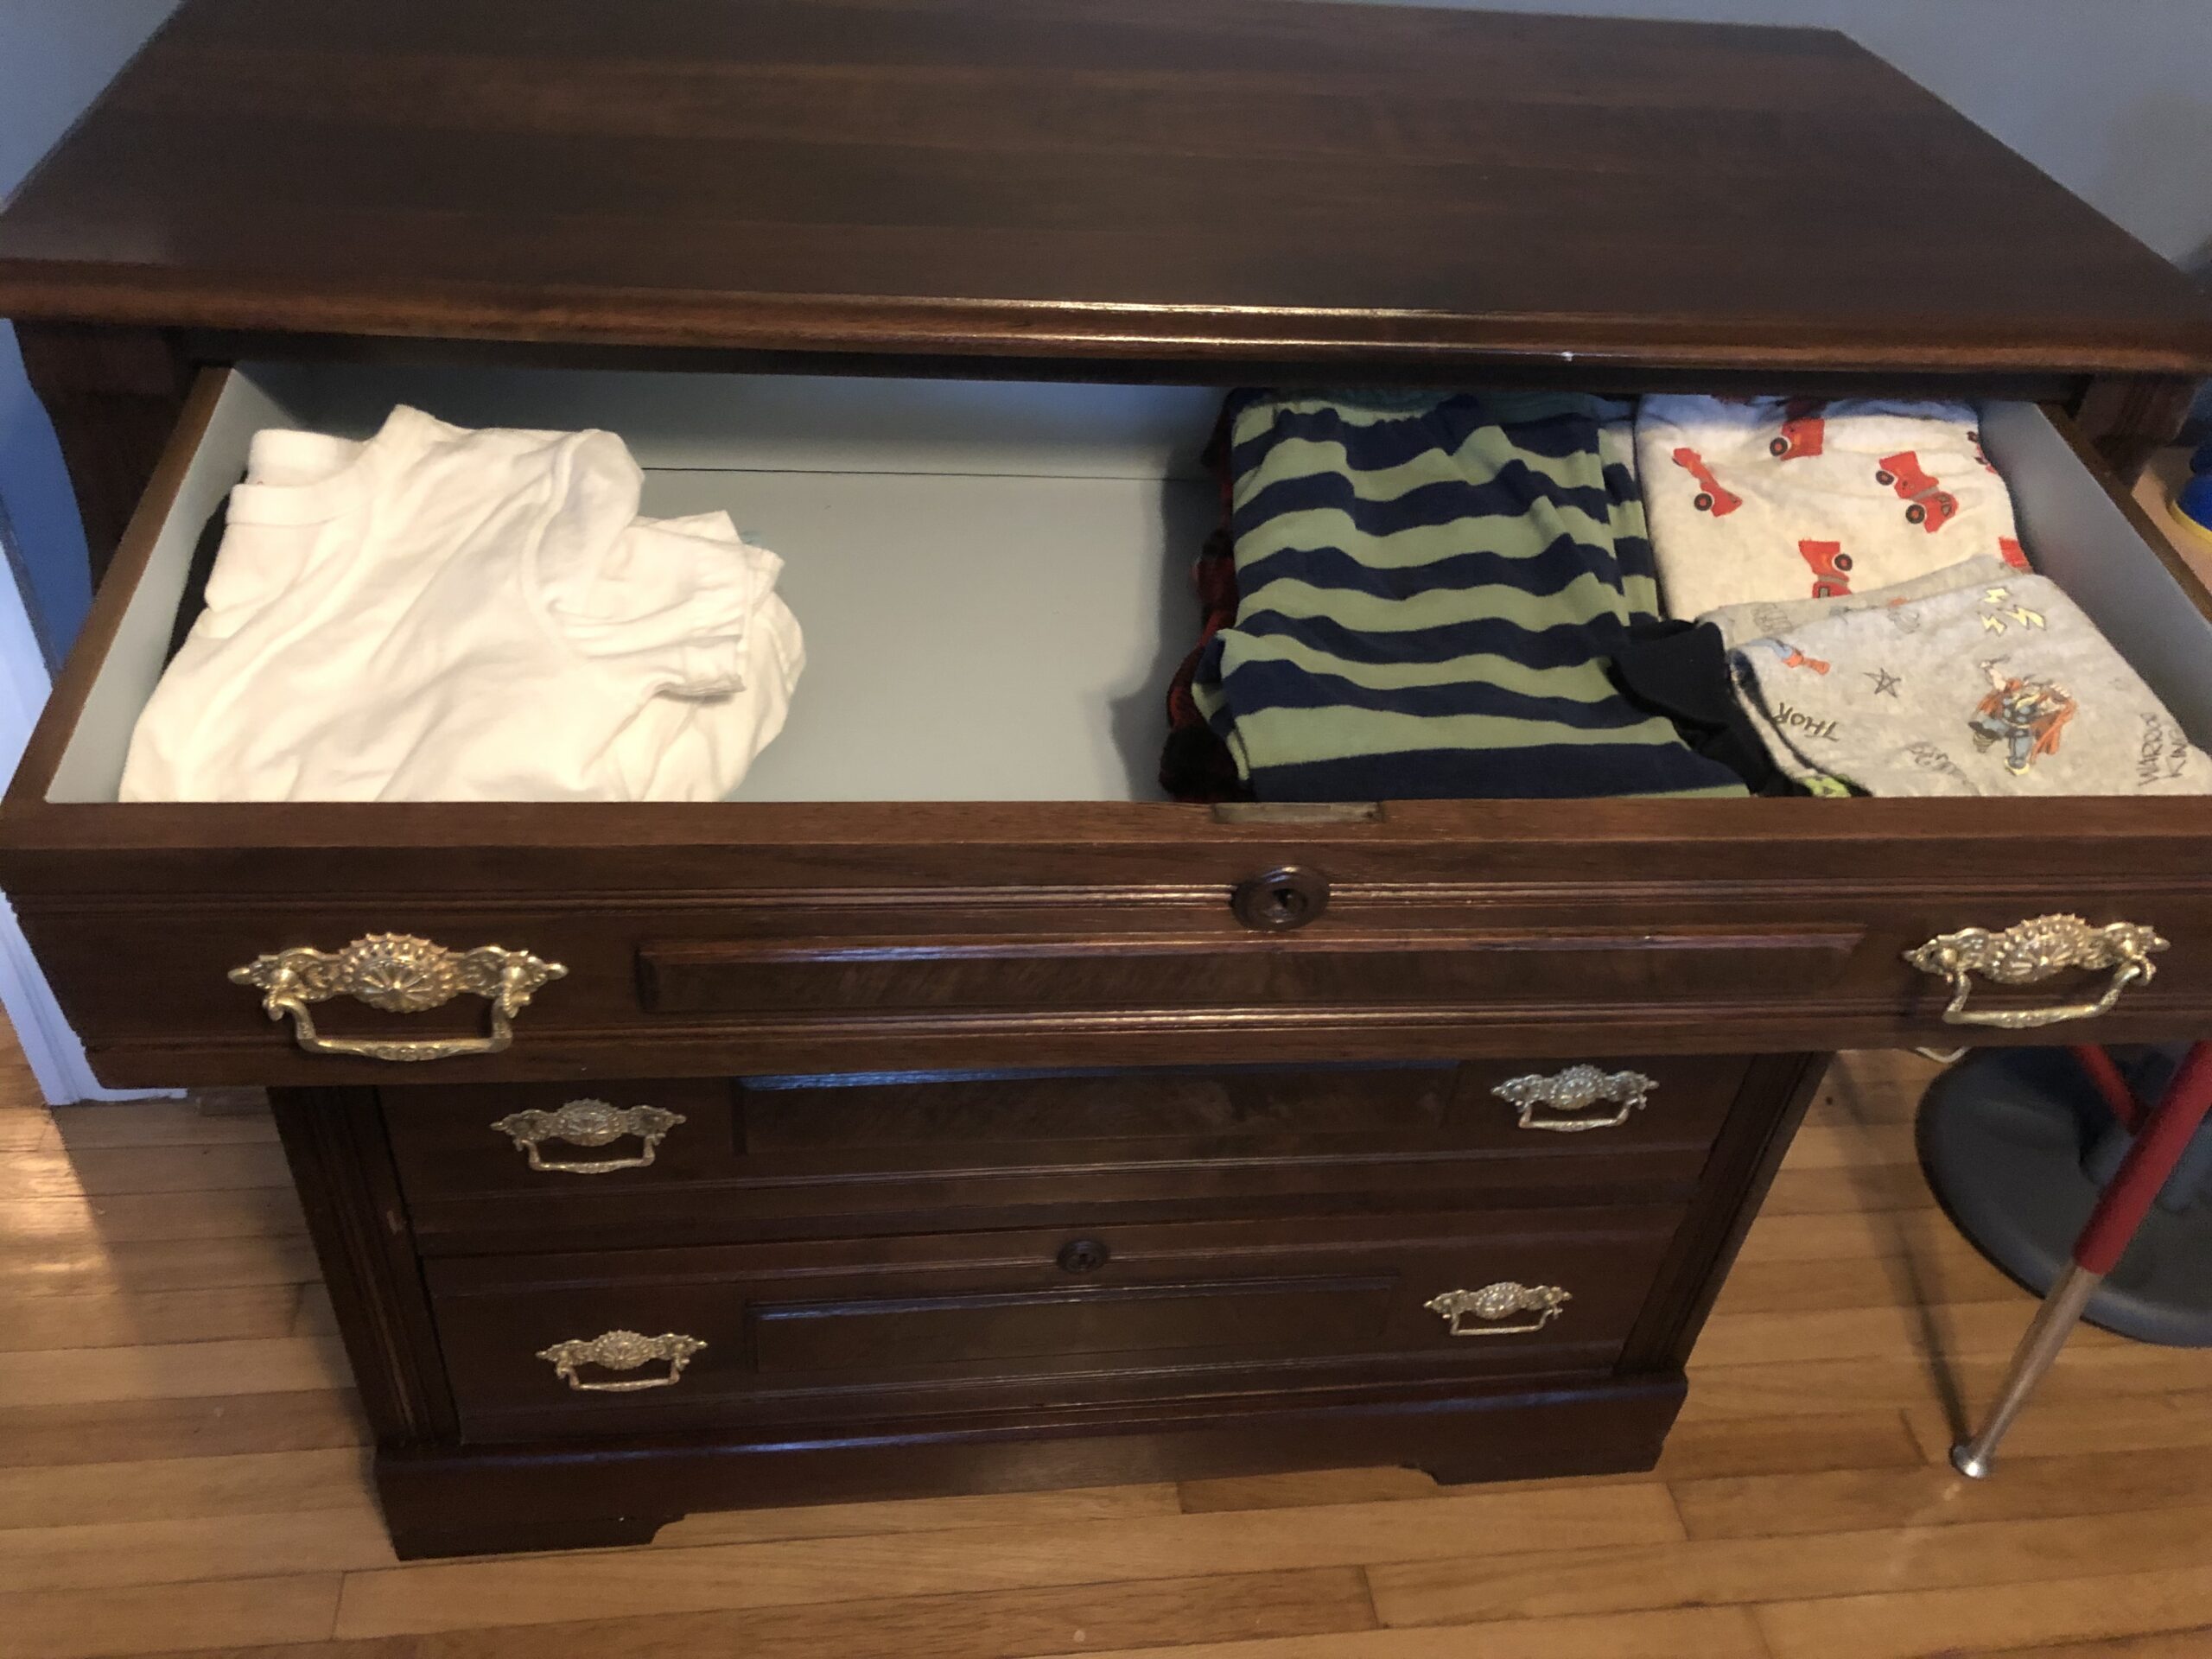
perfect amount of storage! 
spills are easily cleaned 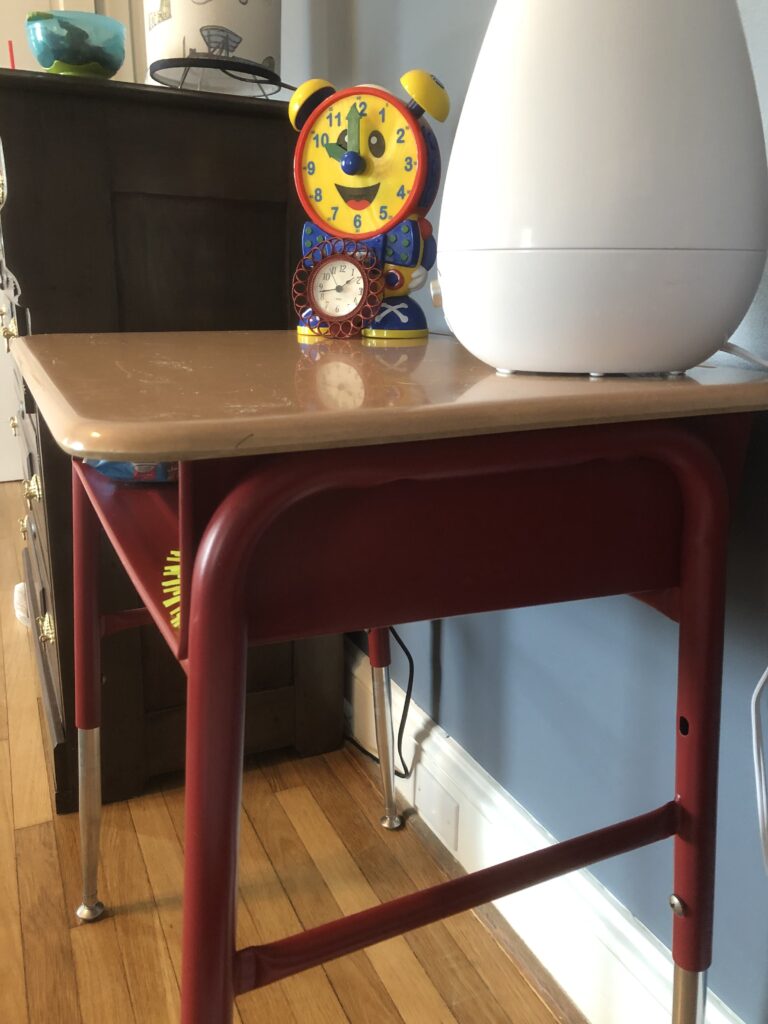
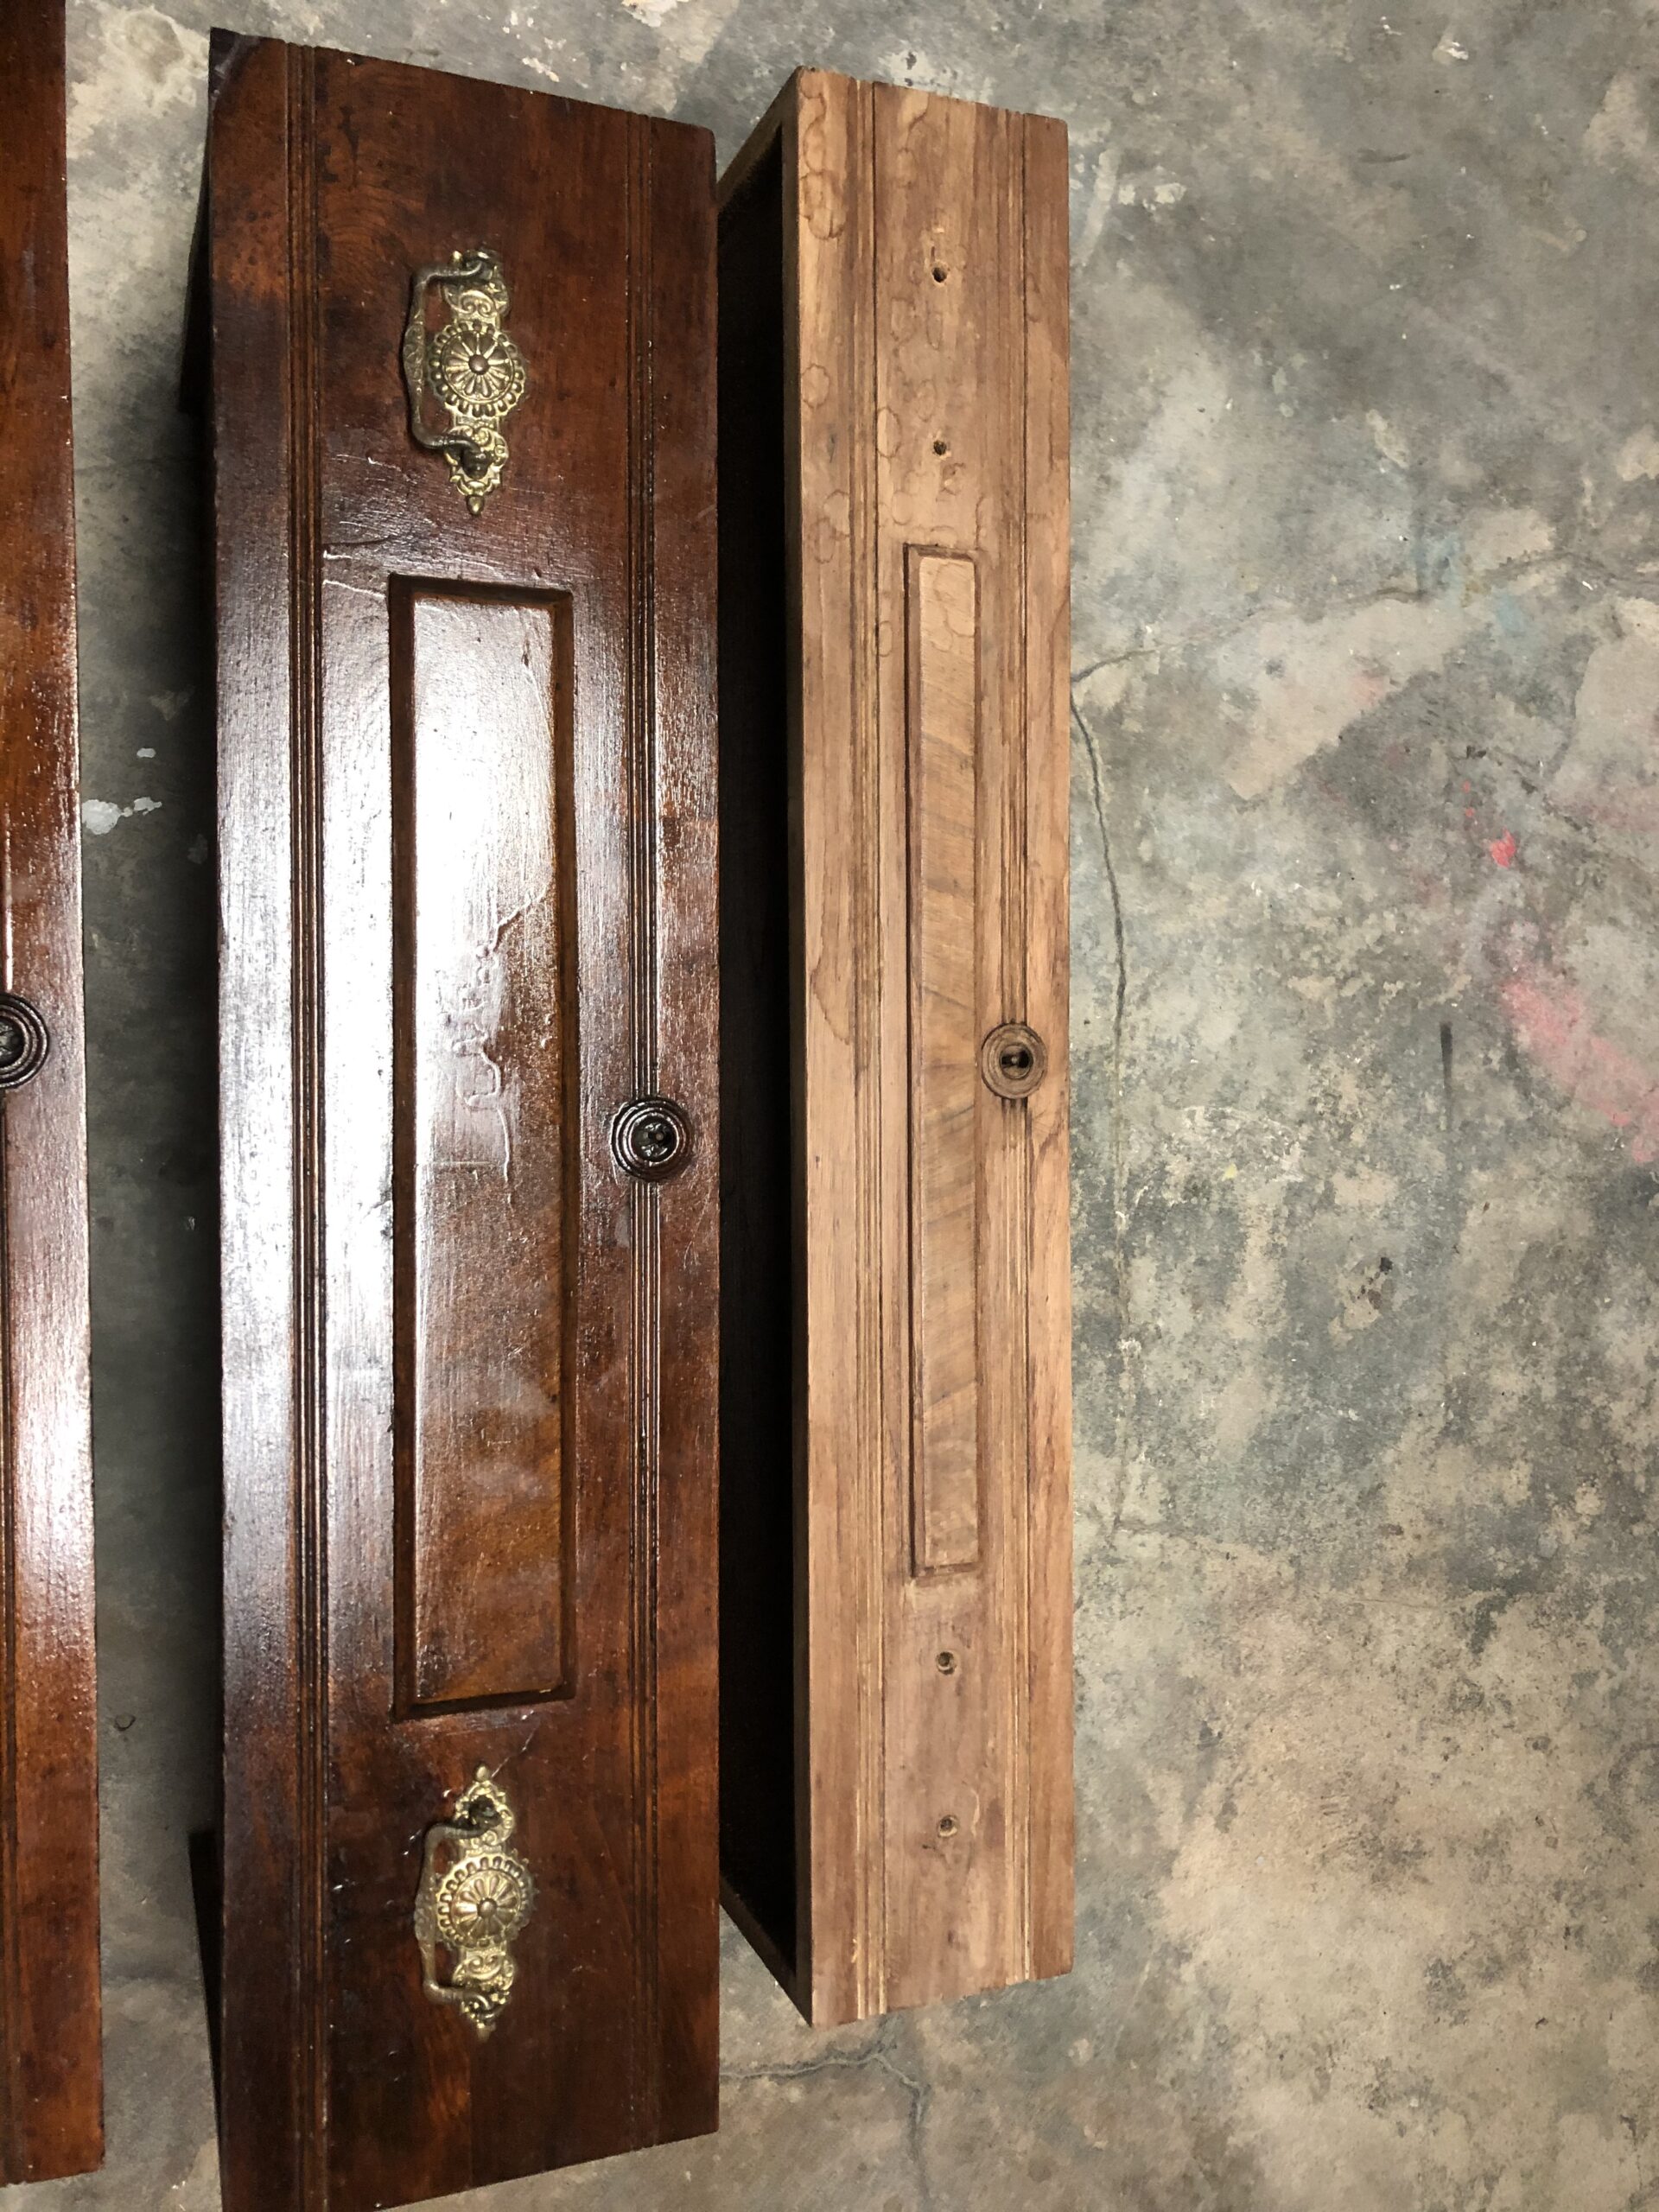
I was determined to reduce the footprint of the dresser, the IKEA dresser was super large, and when he was first born was full of onseies, blankets, and diapers. We even used the top as his changing pad, but now, two of the larger drawers were unused and the darn thing took up so much space. I found an Eastlake style dresser (Marketplace) which needed more work than originally thought. Again, I wanted to make it pretty and functional. So i set to work removing the layers and layers of lacquer. These people must have owned stock in lacquer, because they used it on the inside of the drawers, ensuring the drawer pulls were safe and lacquered to the inside of the drawer (for goodness sake!)
We are going to take a small drive down a dark alley to rant about why “one size fits all gloves” only fit giant man hands. My fingers are short and fat, it is a trait, I am told, I inherited from the French side of my family—but never the less, I have approximately an inch of EXTRA space at the end of the “one size fits all” gloves, and guess where that inch ends up—that’s right, between the steel wool and the piece of wood. Holes in gloves + lacquer thinner = no fingerprints… more robberies are in my future.
The dresser needed love, besides the un-Godly amount of lacquer, someone tried a home fix by shoving nails in the sides and feet (hello, it is called glue—its been around for 6,000 years) and then putting more lacquer on top of it! The faux feet were so badly damaged, I had to create new ones from a piece of oak. I honed my coping saw skills on this one. And set to work trying to match stain, I don’t think I did too bad.
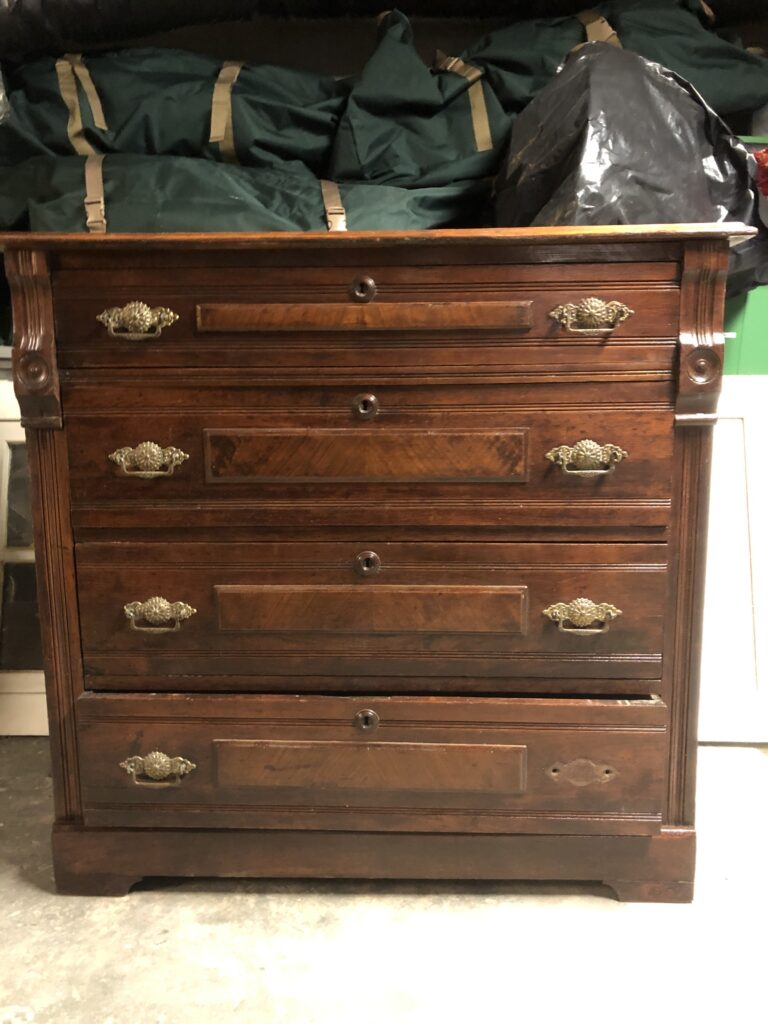
Eastlake Dresser 
Old and Dirty Pull 
Can you see the dust? 
removing the lacquer 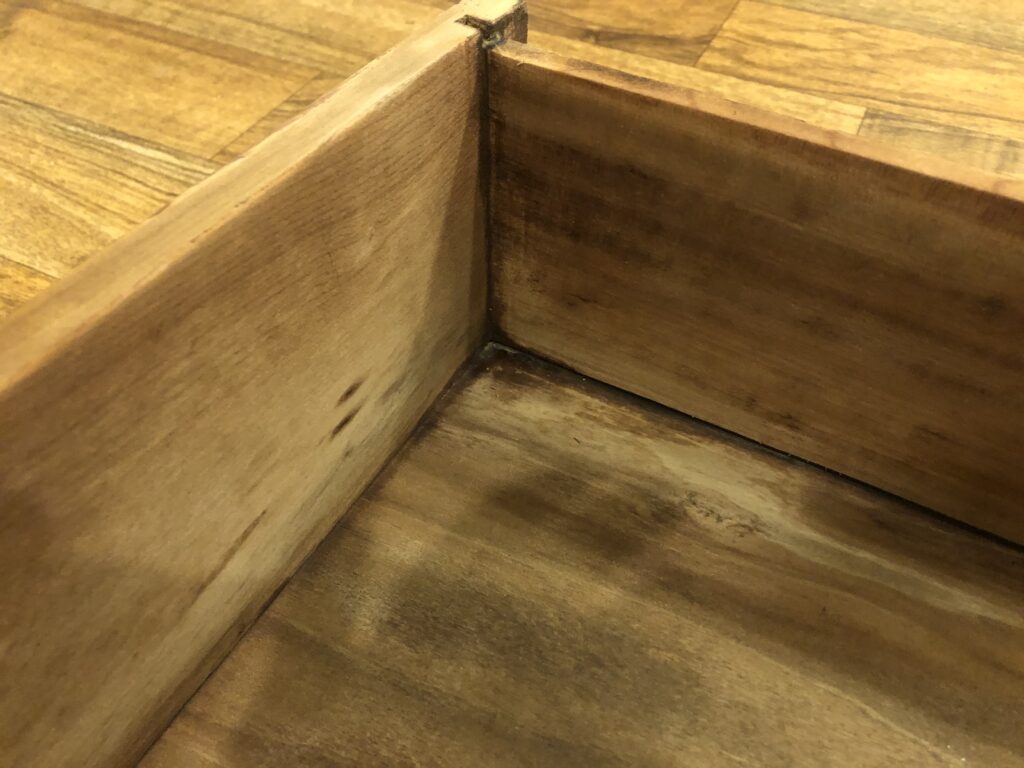
dirty lacquered interior 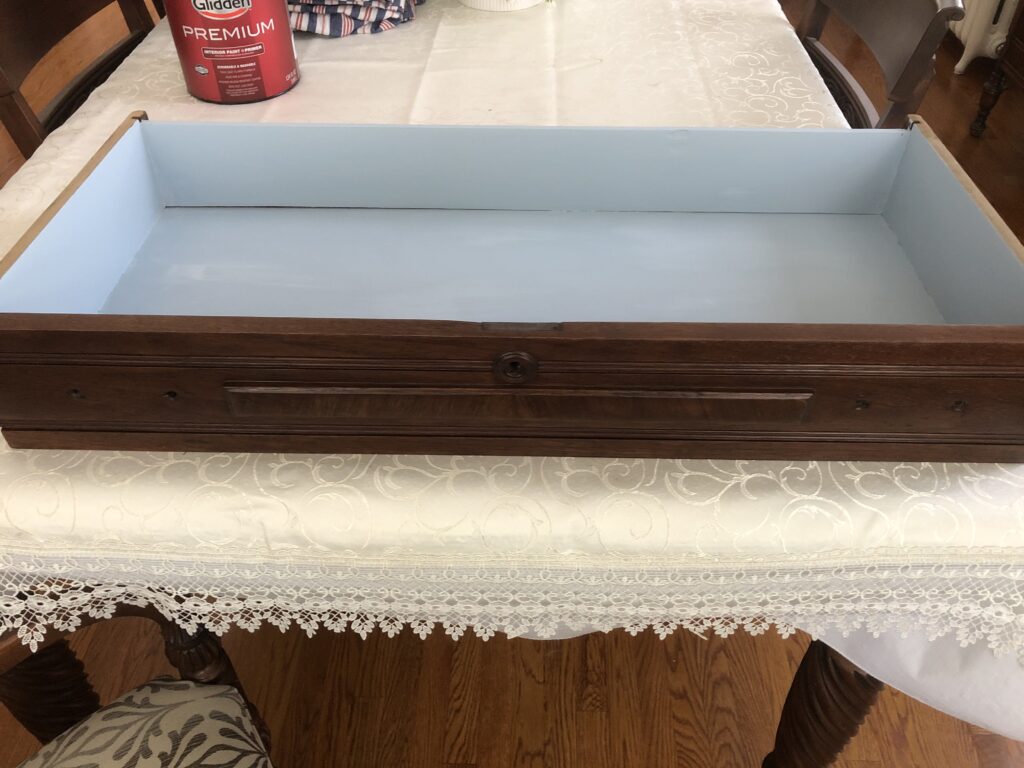
painted drawer interior


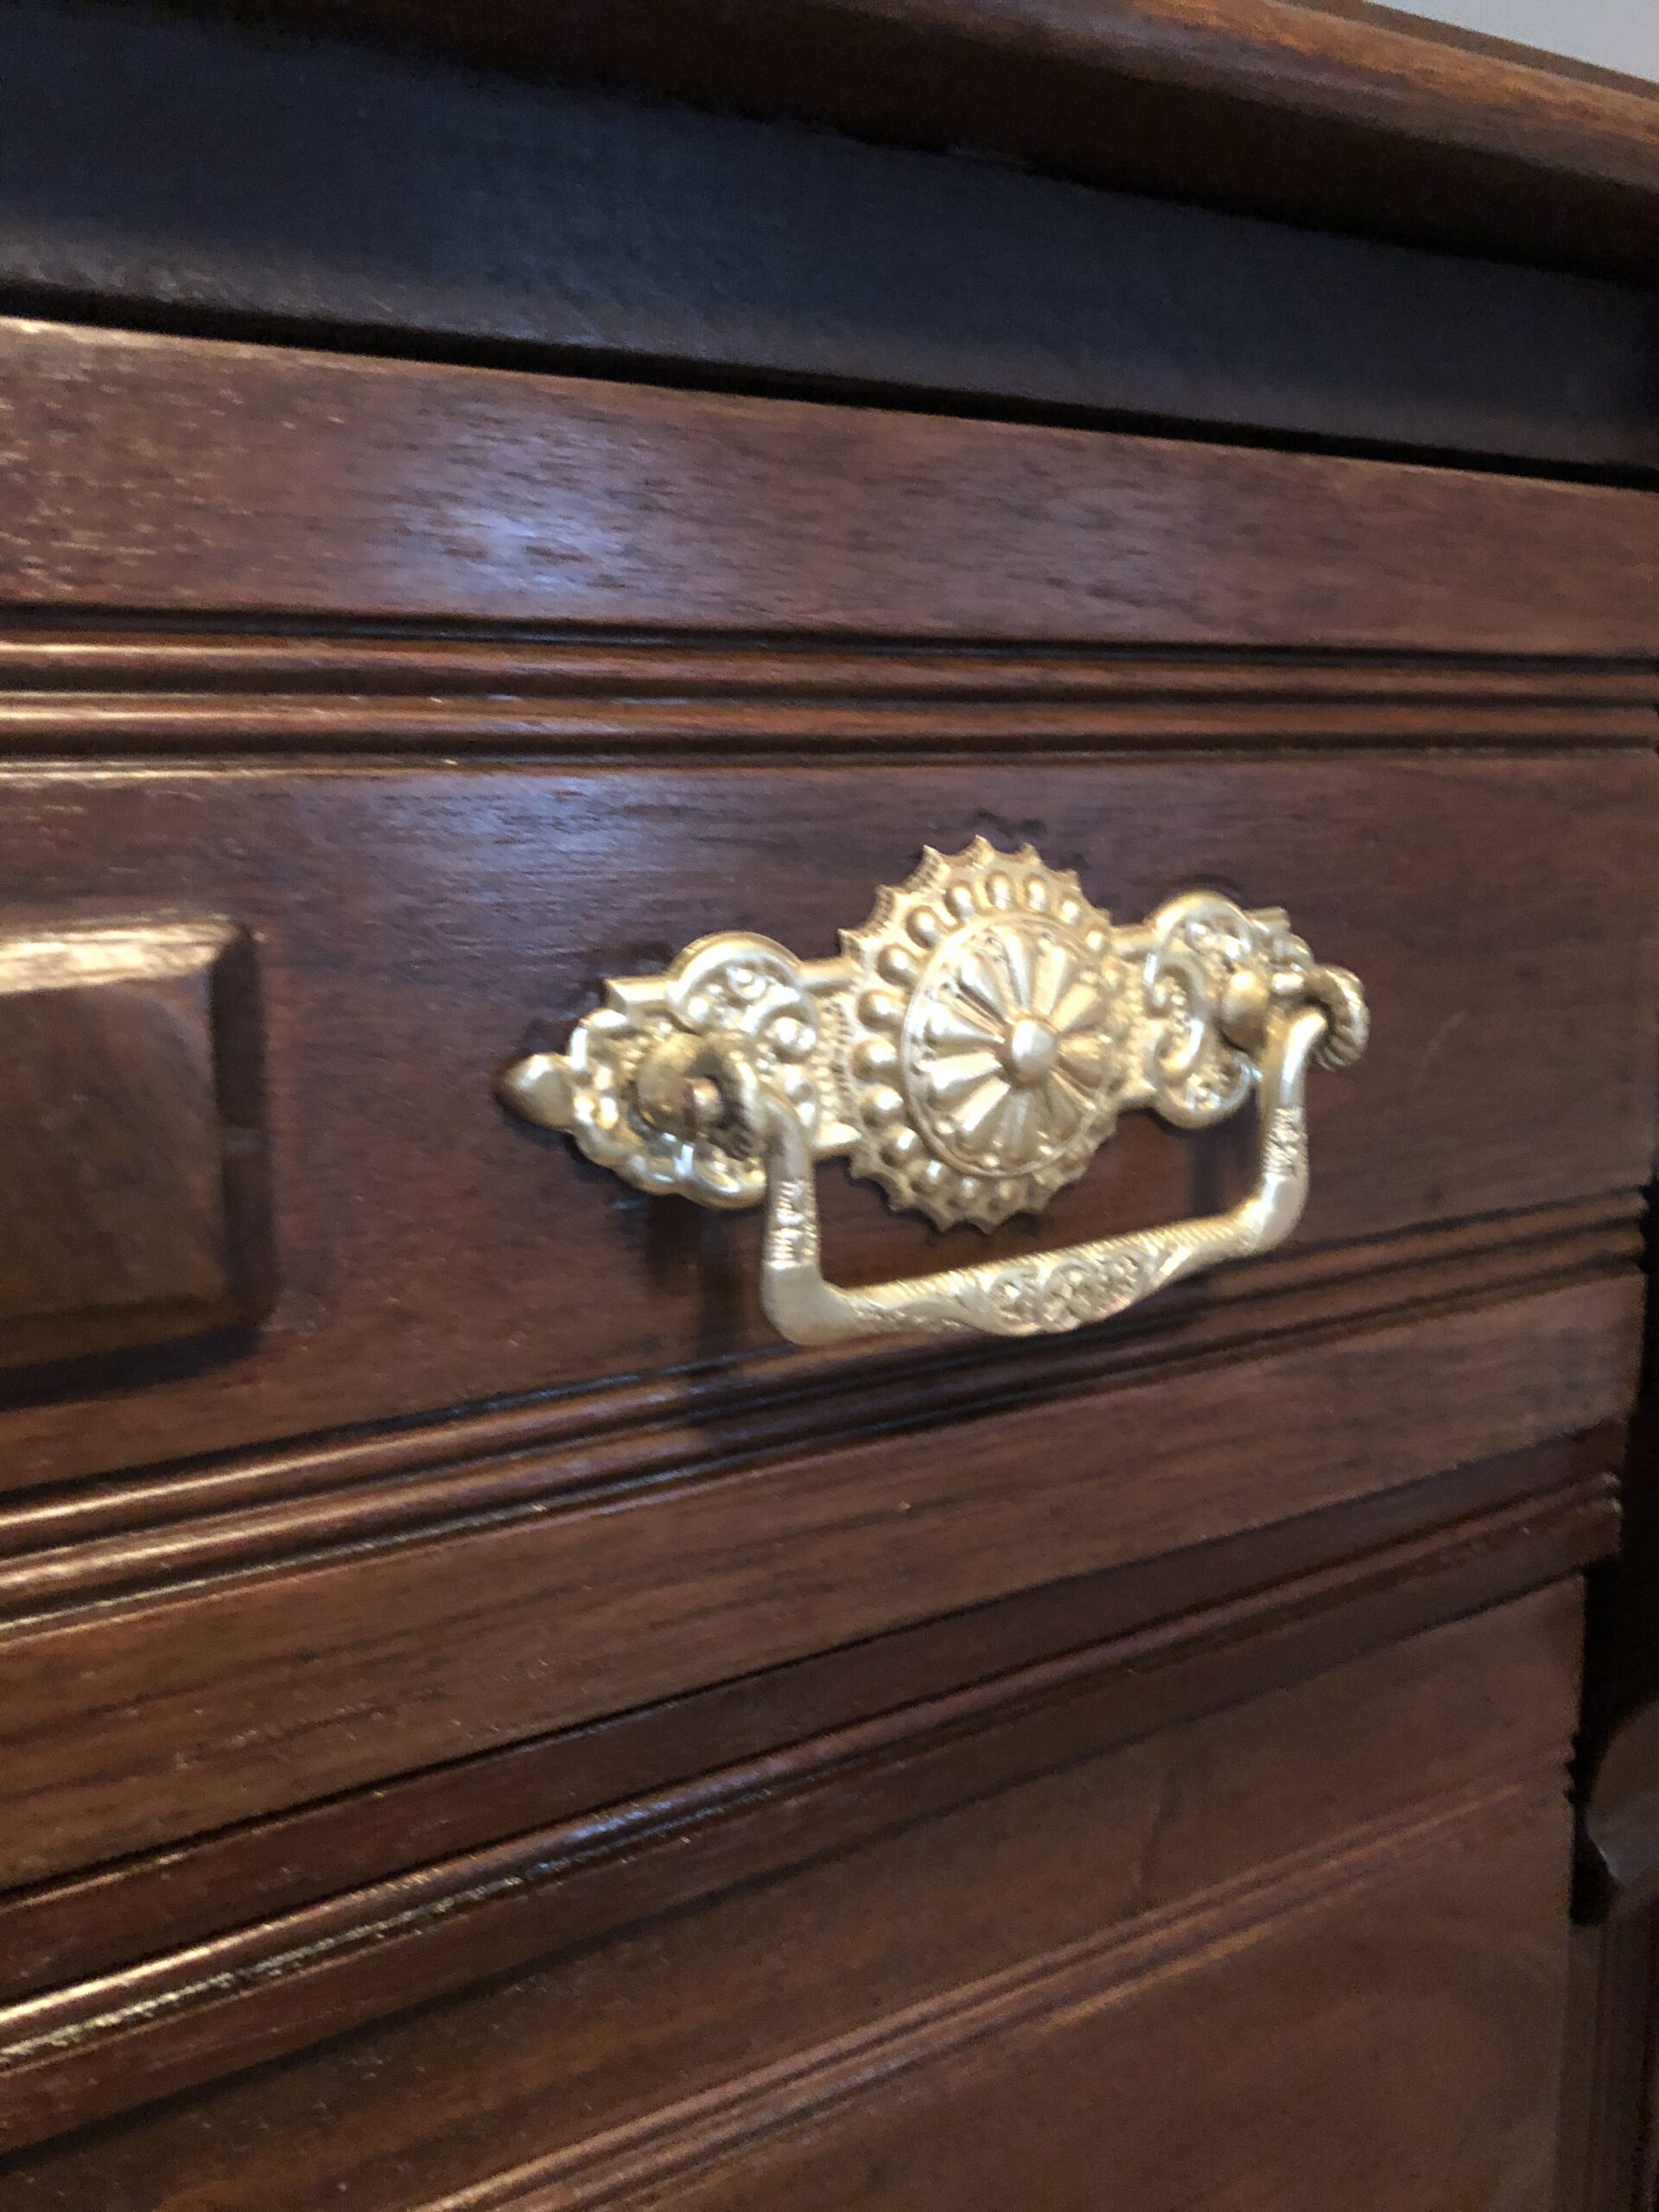
Of course there were lacquered brass pulls to contend with. What did we do before Google???? I can’t even remember. To remove lacquer from brass, you boil it with baking soda (1 tablespoon of soda to 33 oz of water), which of course creates a new problem, some of the brass turns pink. To remove the pink from brass, I use a 5% ammonium citrate solution with a pH of 9. Google says to use 50 grams (approx 3 tablespoons) of citric acid to 1 liter (approx 4 cups) of water and add ammonia until the pH is 9 (I bought this little thing on Amazon). Then I let the brass sit in the solution for a little while (about 2 hours for my stuff). I then polish with Brasso and poof!
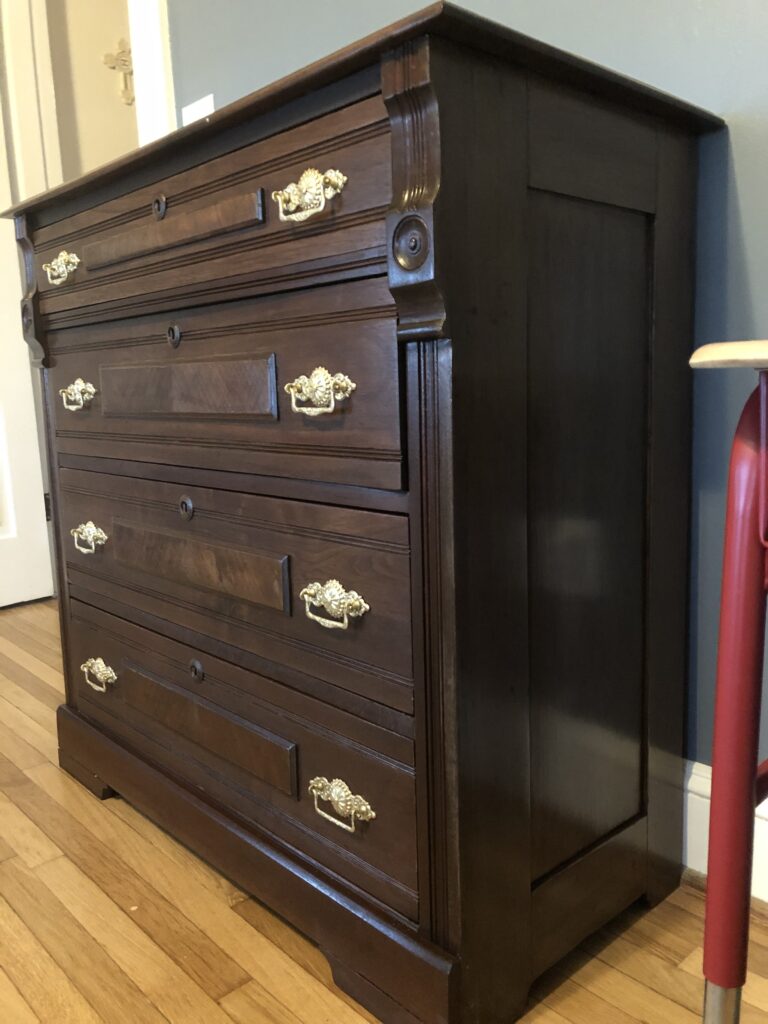
Refinished Eastlake Dresser (new feet) 
Clean and Polished Pulls 
Painted interior

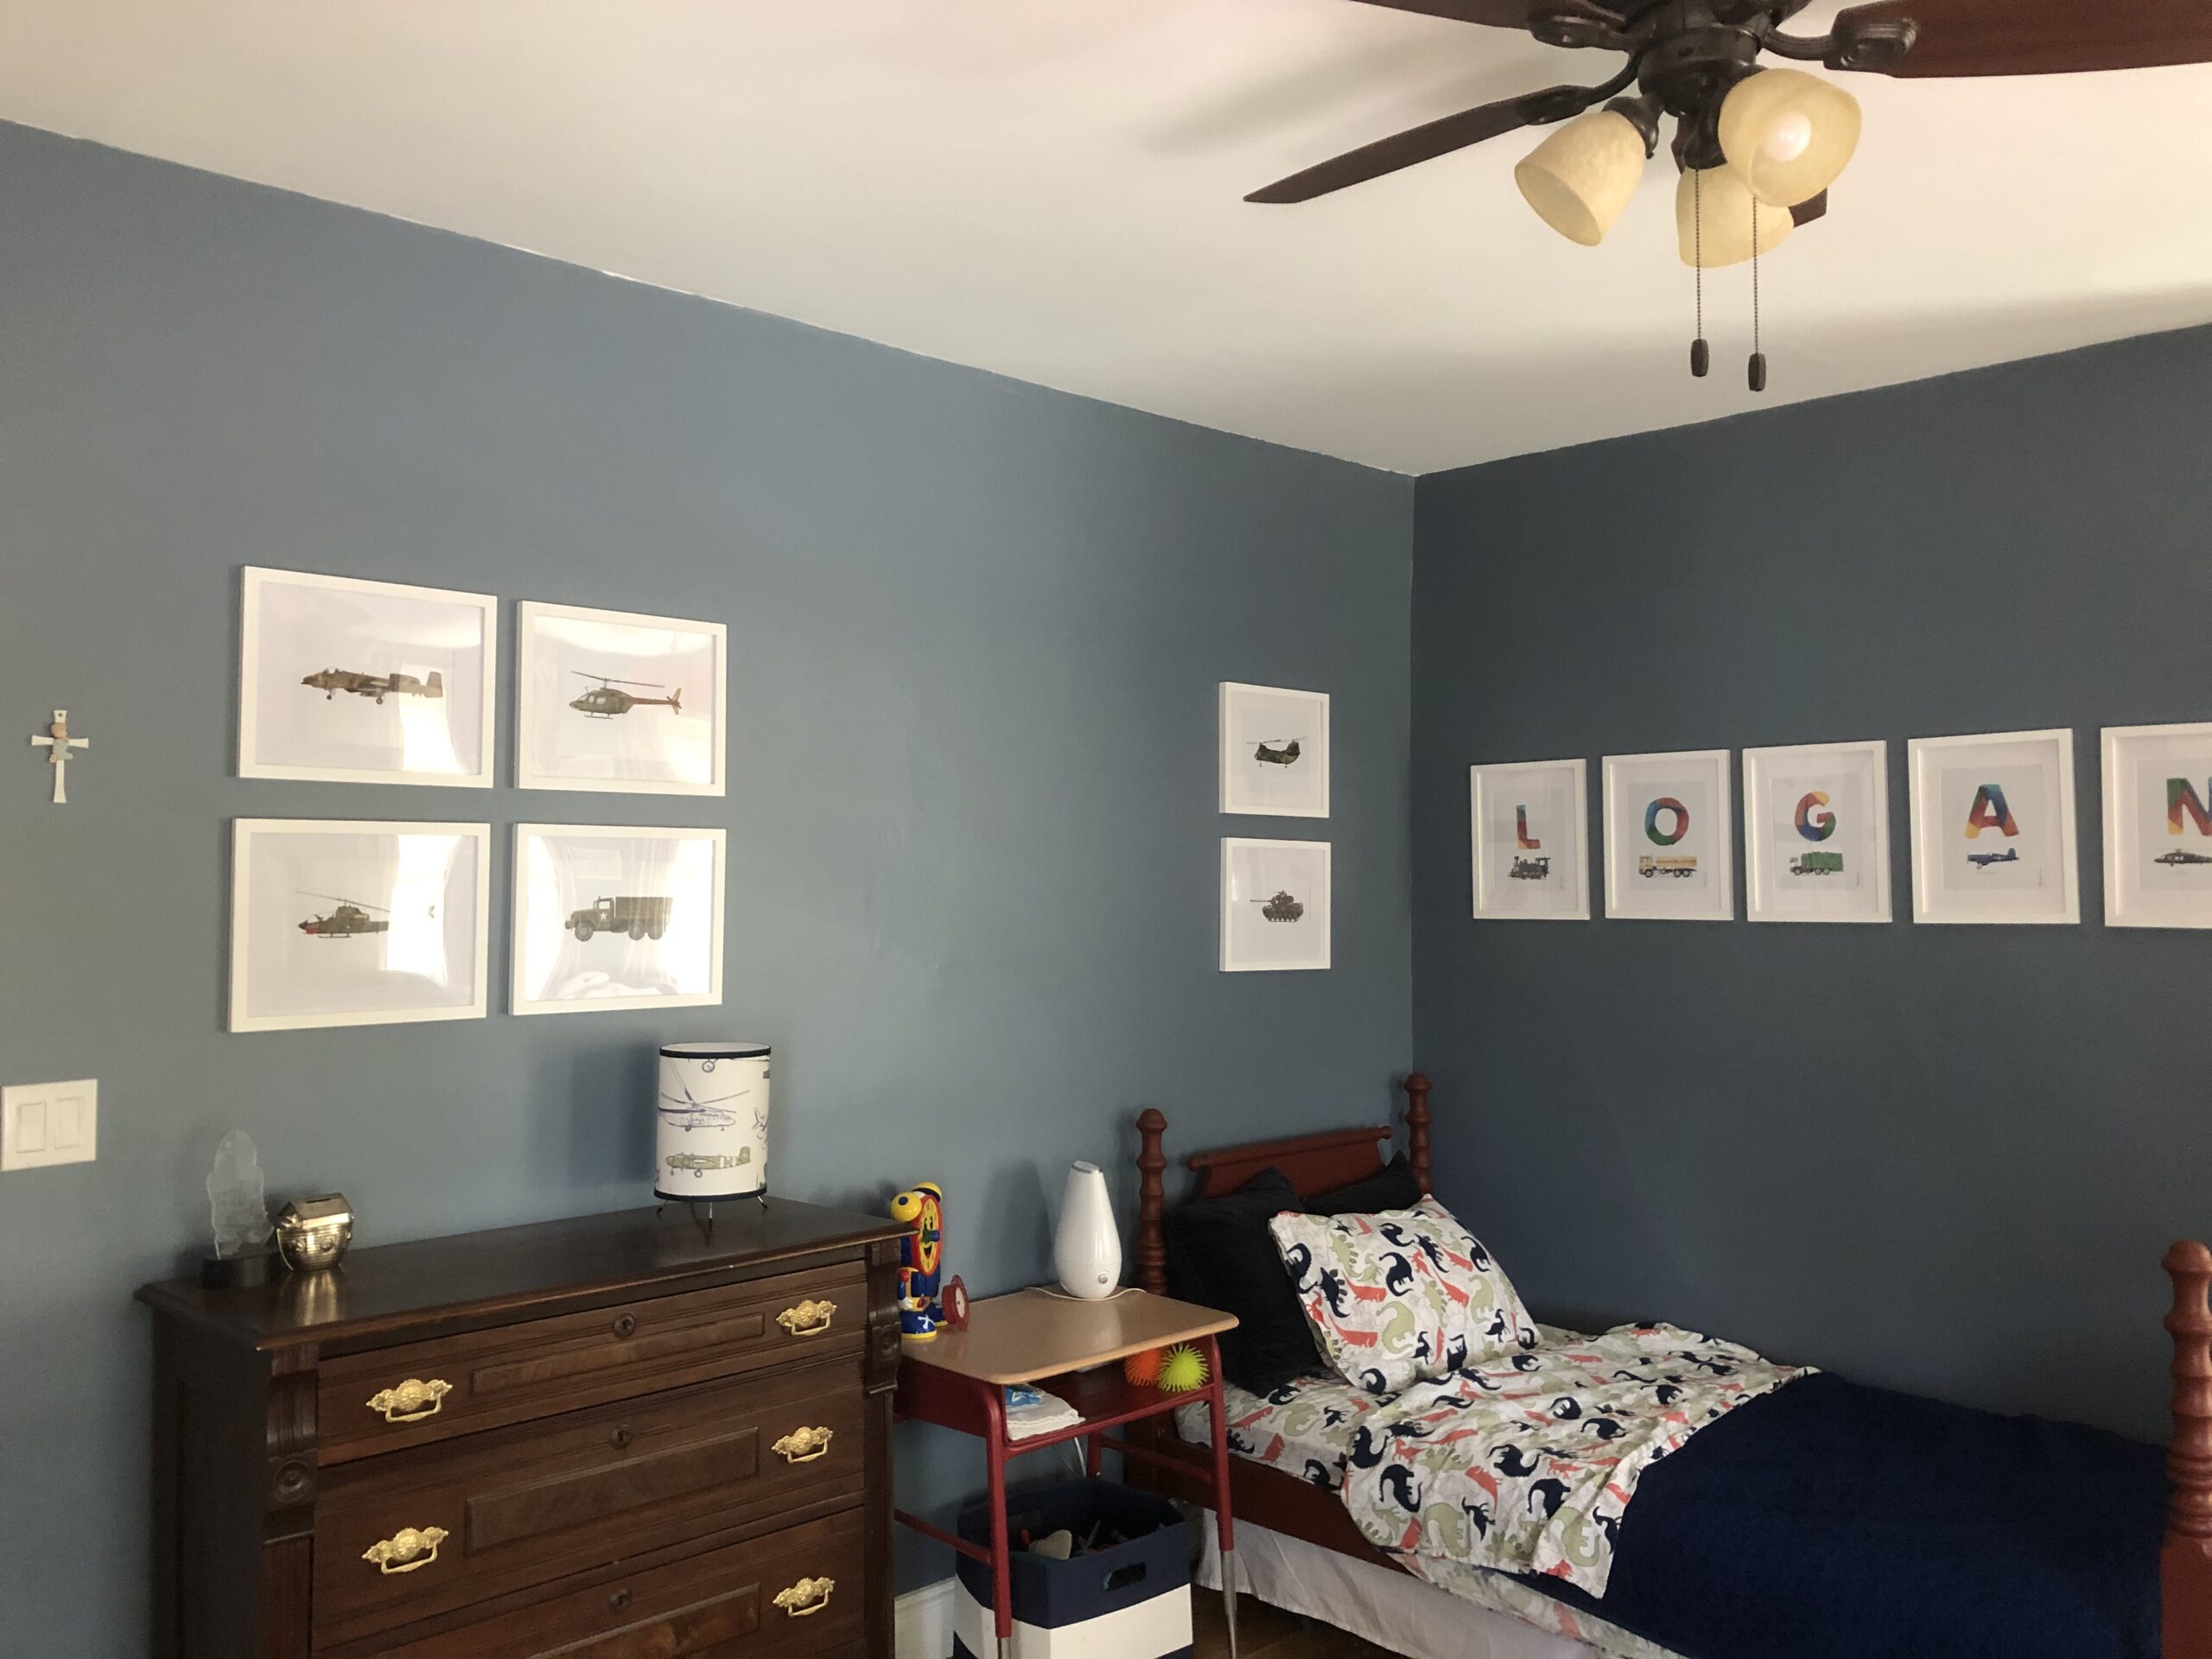
With new furniture, comes new walls… I decided to paint his room in a deep rich blue (not red, to his disgust). The more I paint the rooms in the Good House, I realize they should all be painted deep moody colors, the rooms seem so vibrant and alive. Of course the ceiling received an update, bright white to cover the swiss (not white) coffee. The color I chose for the walls was Benjamin Moore’s Bachelor Blue 1629. I put a small test on the wall, and it looked much darker than it did online, but I really liked it, so I bit the bullet and bought the gallon. When I started painting over the nursery silver gray, I HATED the Bachelor Blue, it looked dark gray and I thought I had made a mistake. But after the second coat dried this deep blue, I knew I was in love with the Bachelor 😉
Of course, we had to have a little bit of IKEA still in the room, and when I saw the Bergskrabba curtains, I thought they were super fun for the room, and bonus, it had a red stripe, but the gray just wouldn’t go with the new color scheme. So I fell down the rabbit hole of internet curtains for a few days and came across a similar version, but with blue instead of gray! I began my search for the blue version of Bergskrabba and found them on EBay (of course)!
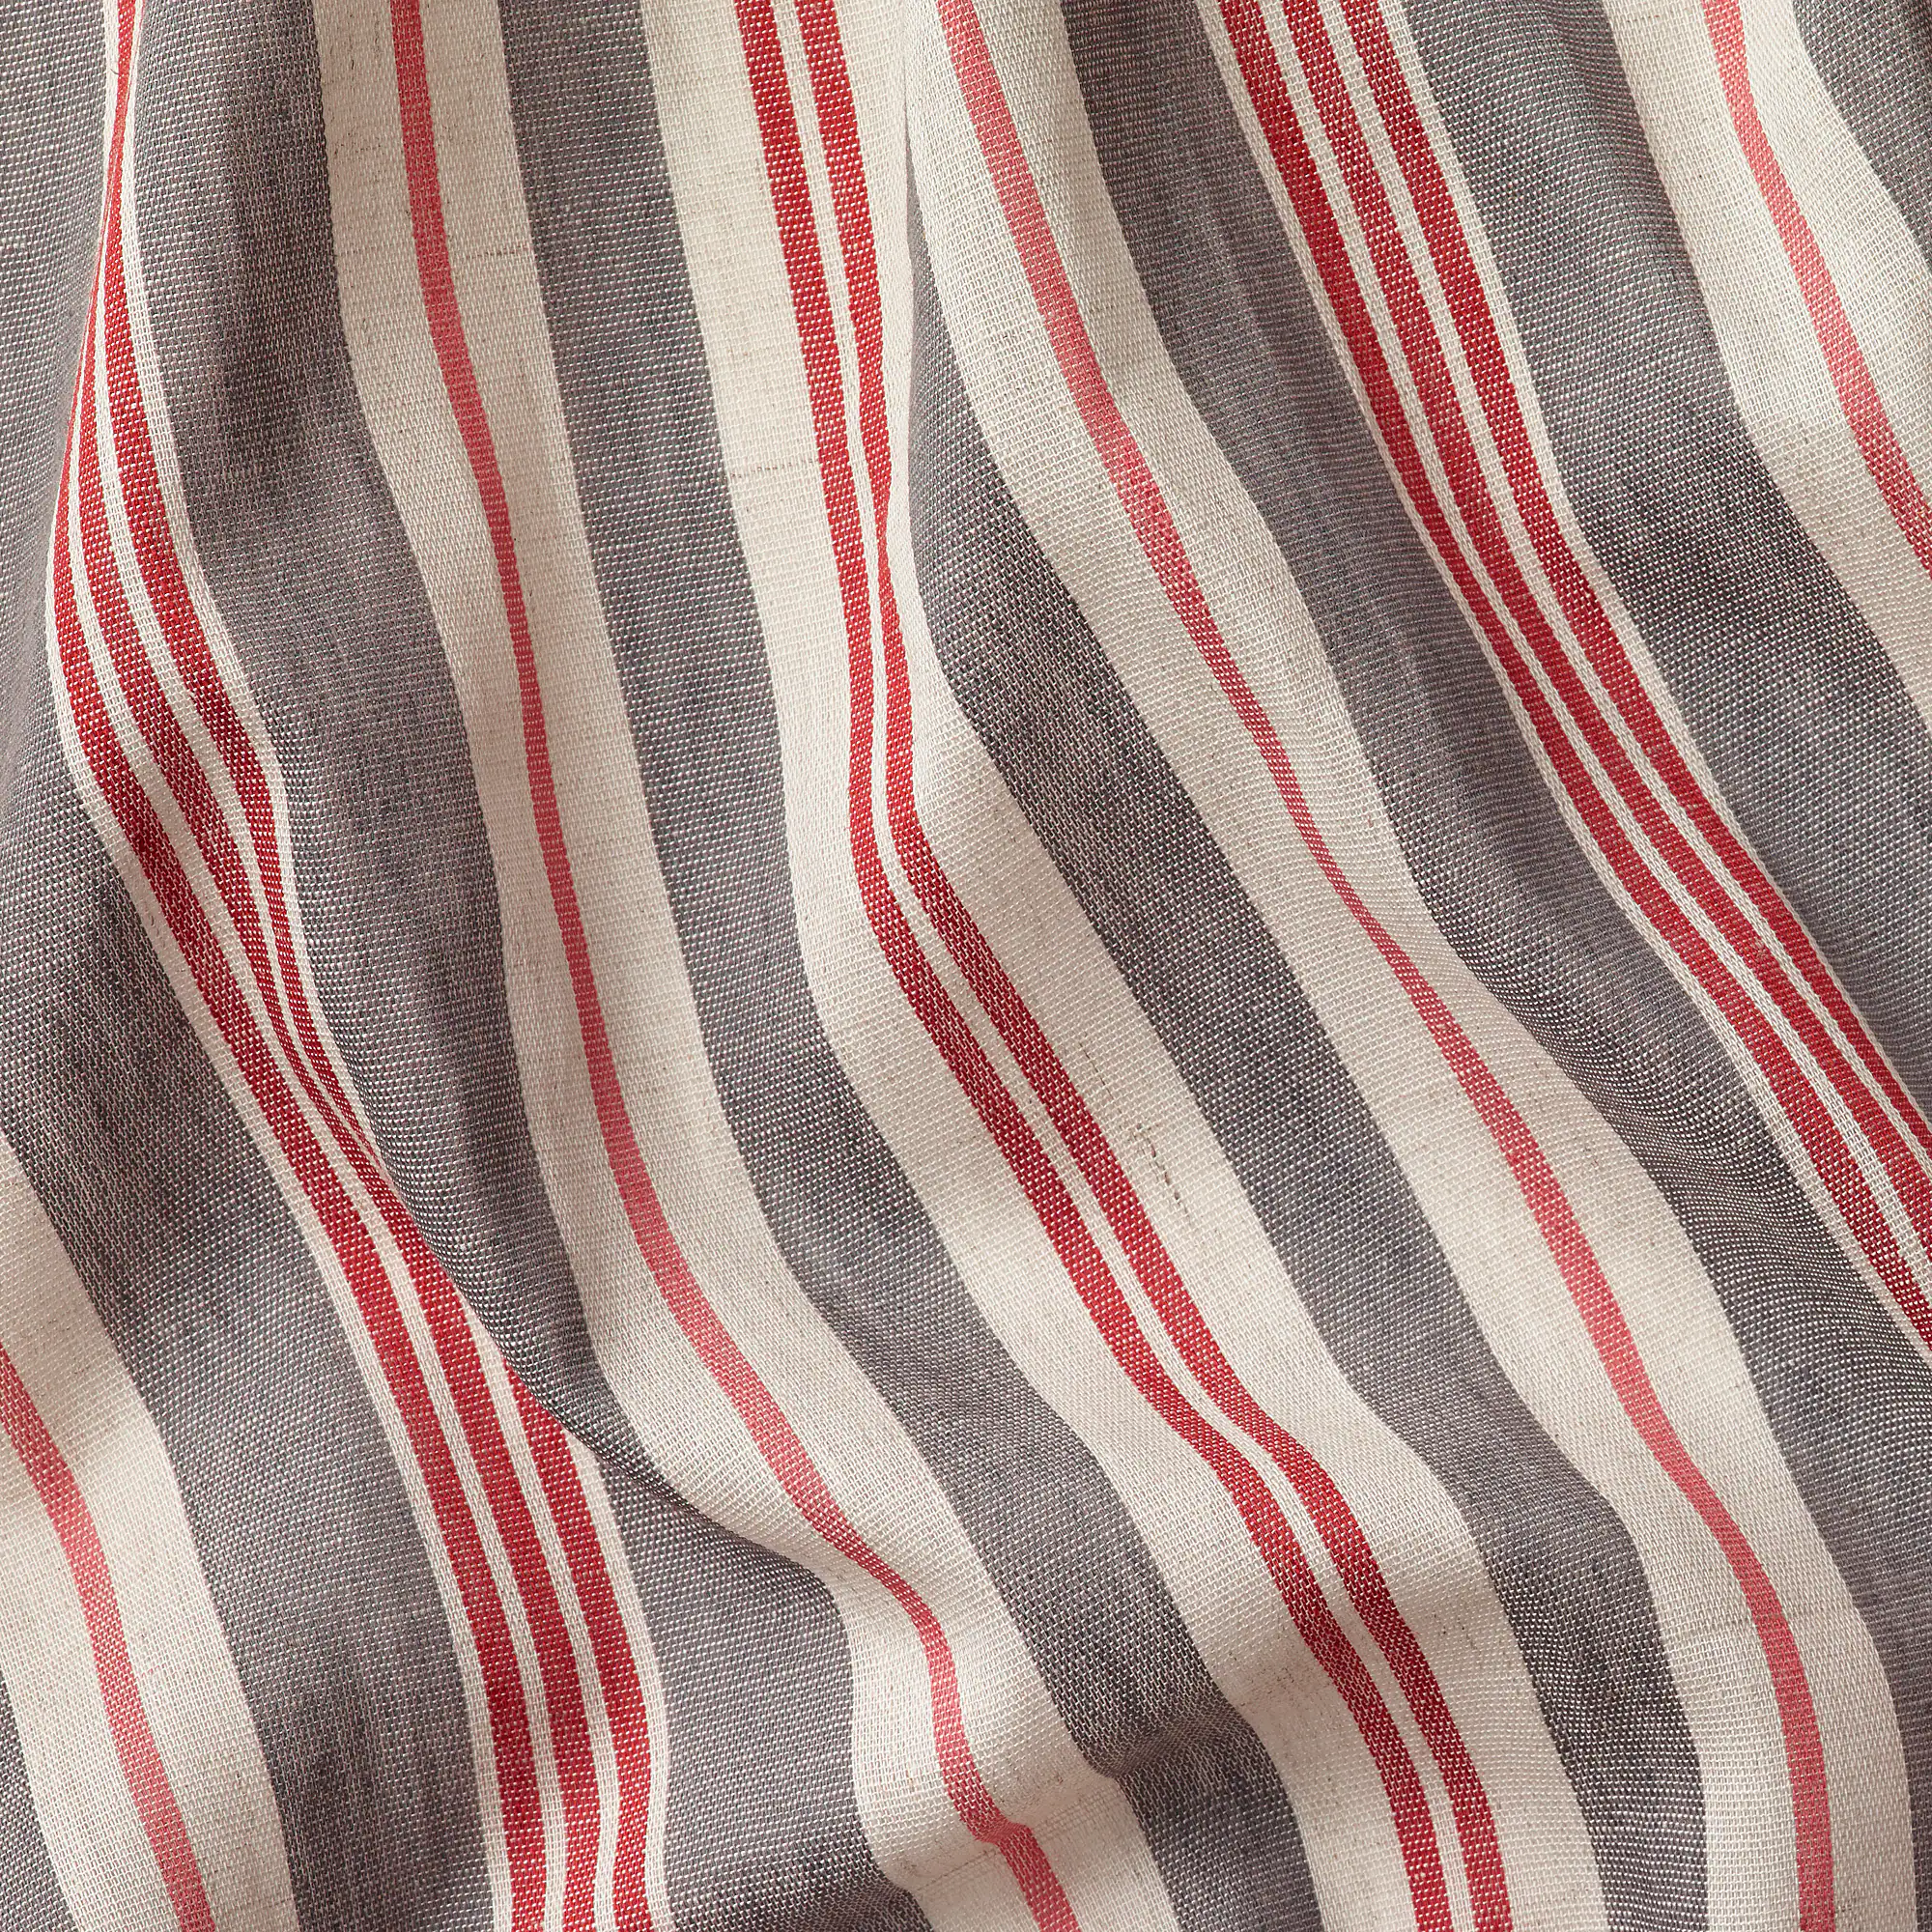
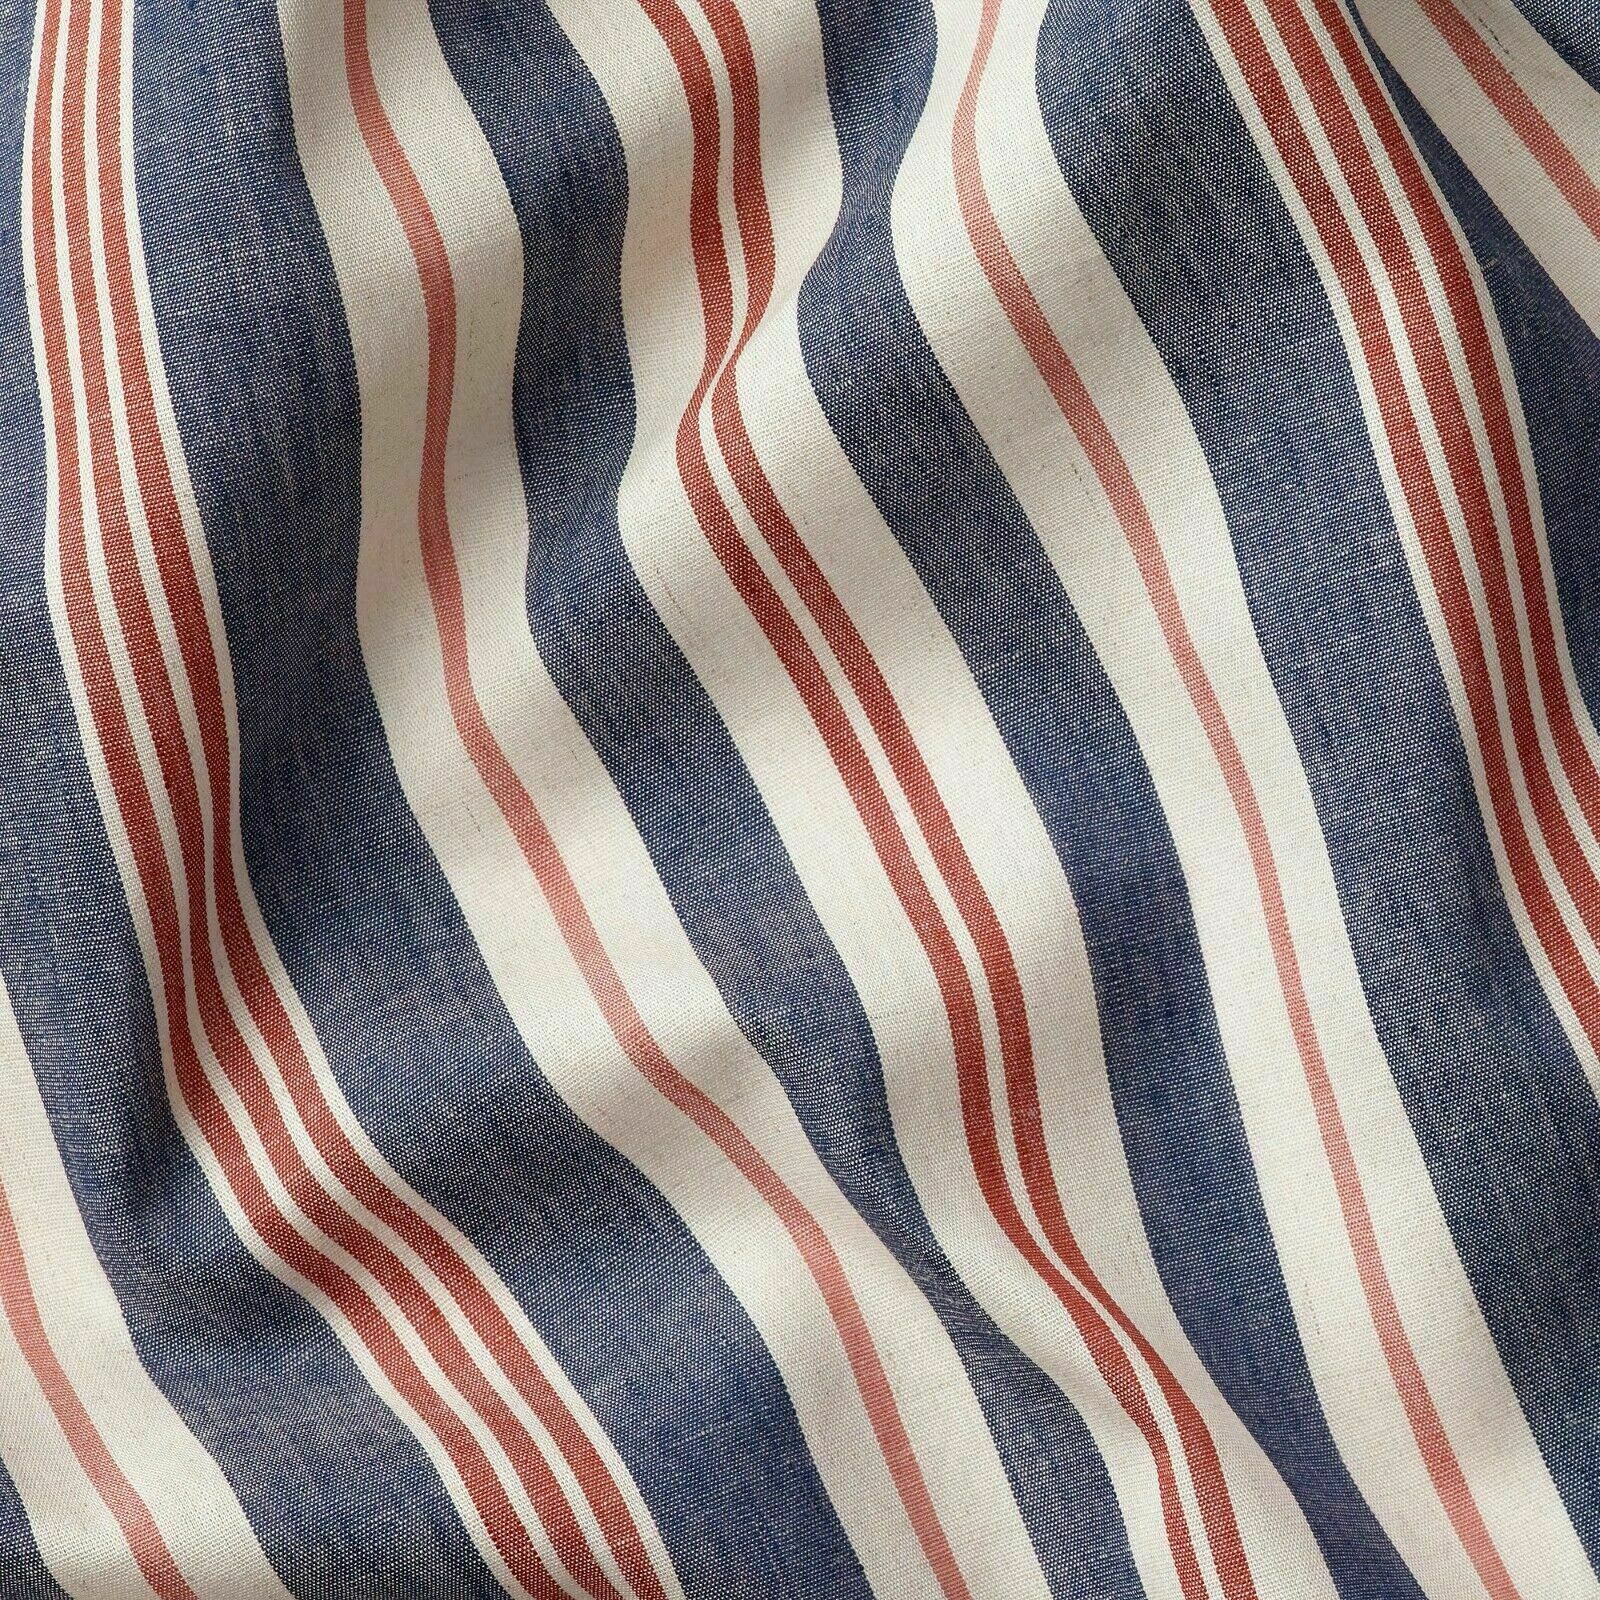
The IKEA Bergskrabba have these wonderful little brackets on the back, which make hanging a breeze, and so after a little modification (length) they were up and added a little bit of whimsy to the room… I thought they appeared a little circus-tent like, but the room dweller informed me that they are “red Hot-Wheels track”… I hope that wasn’t a threat.
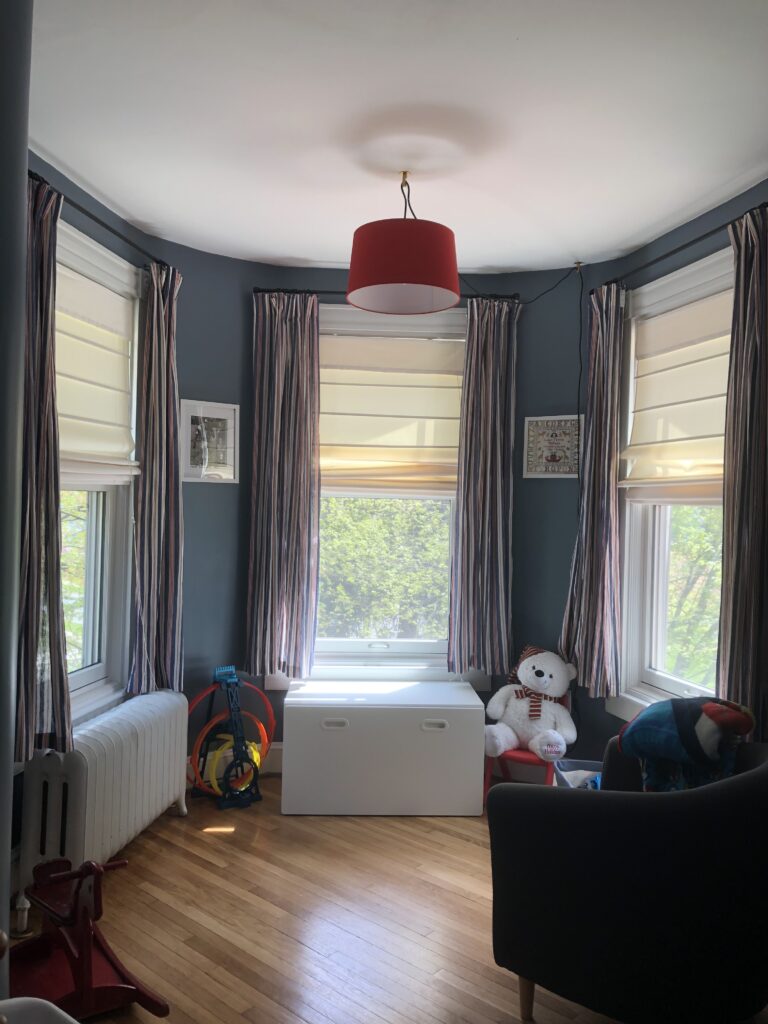
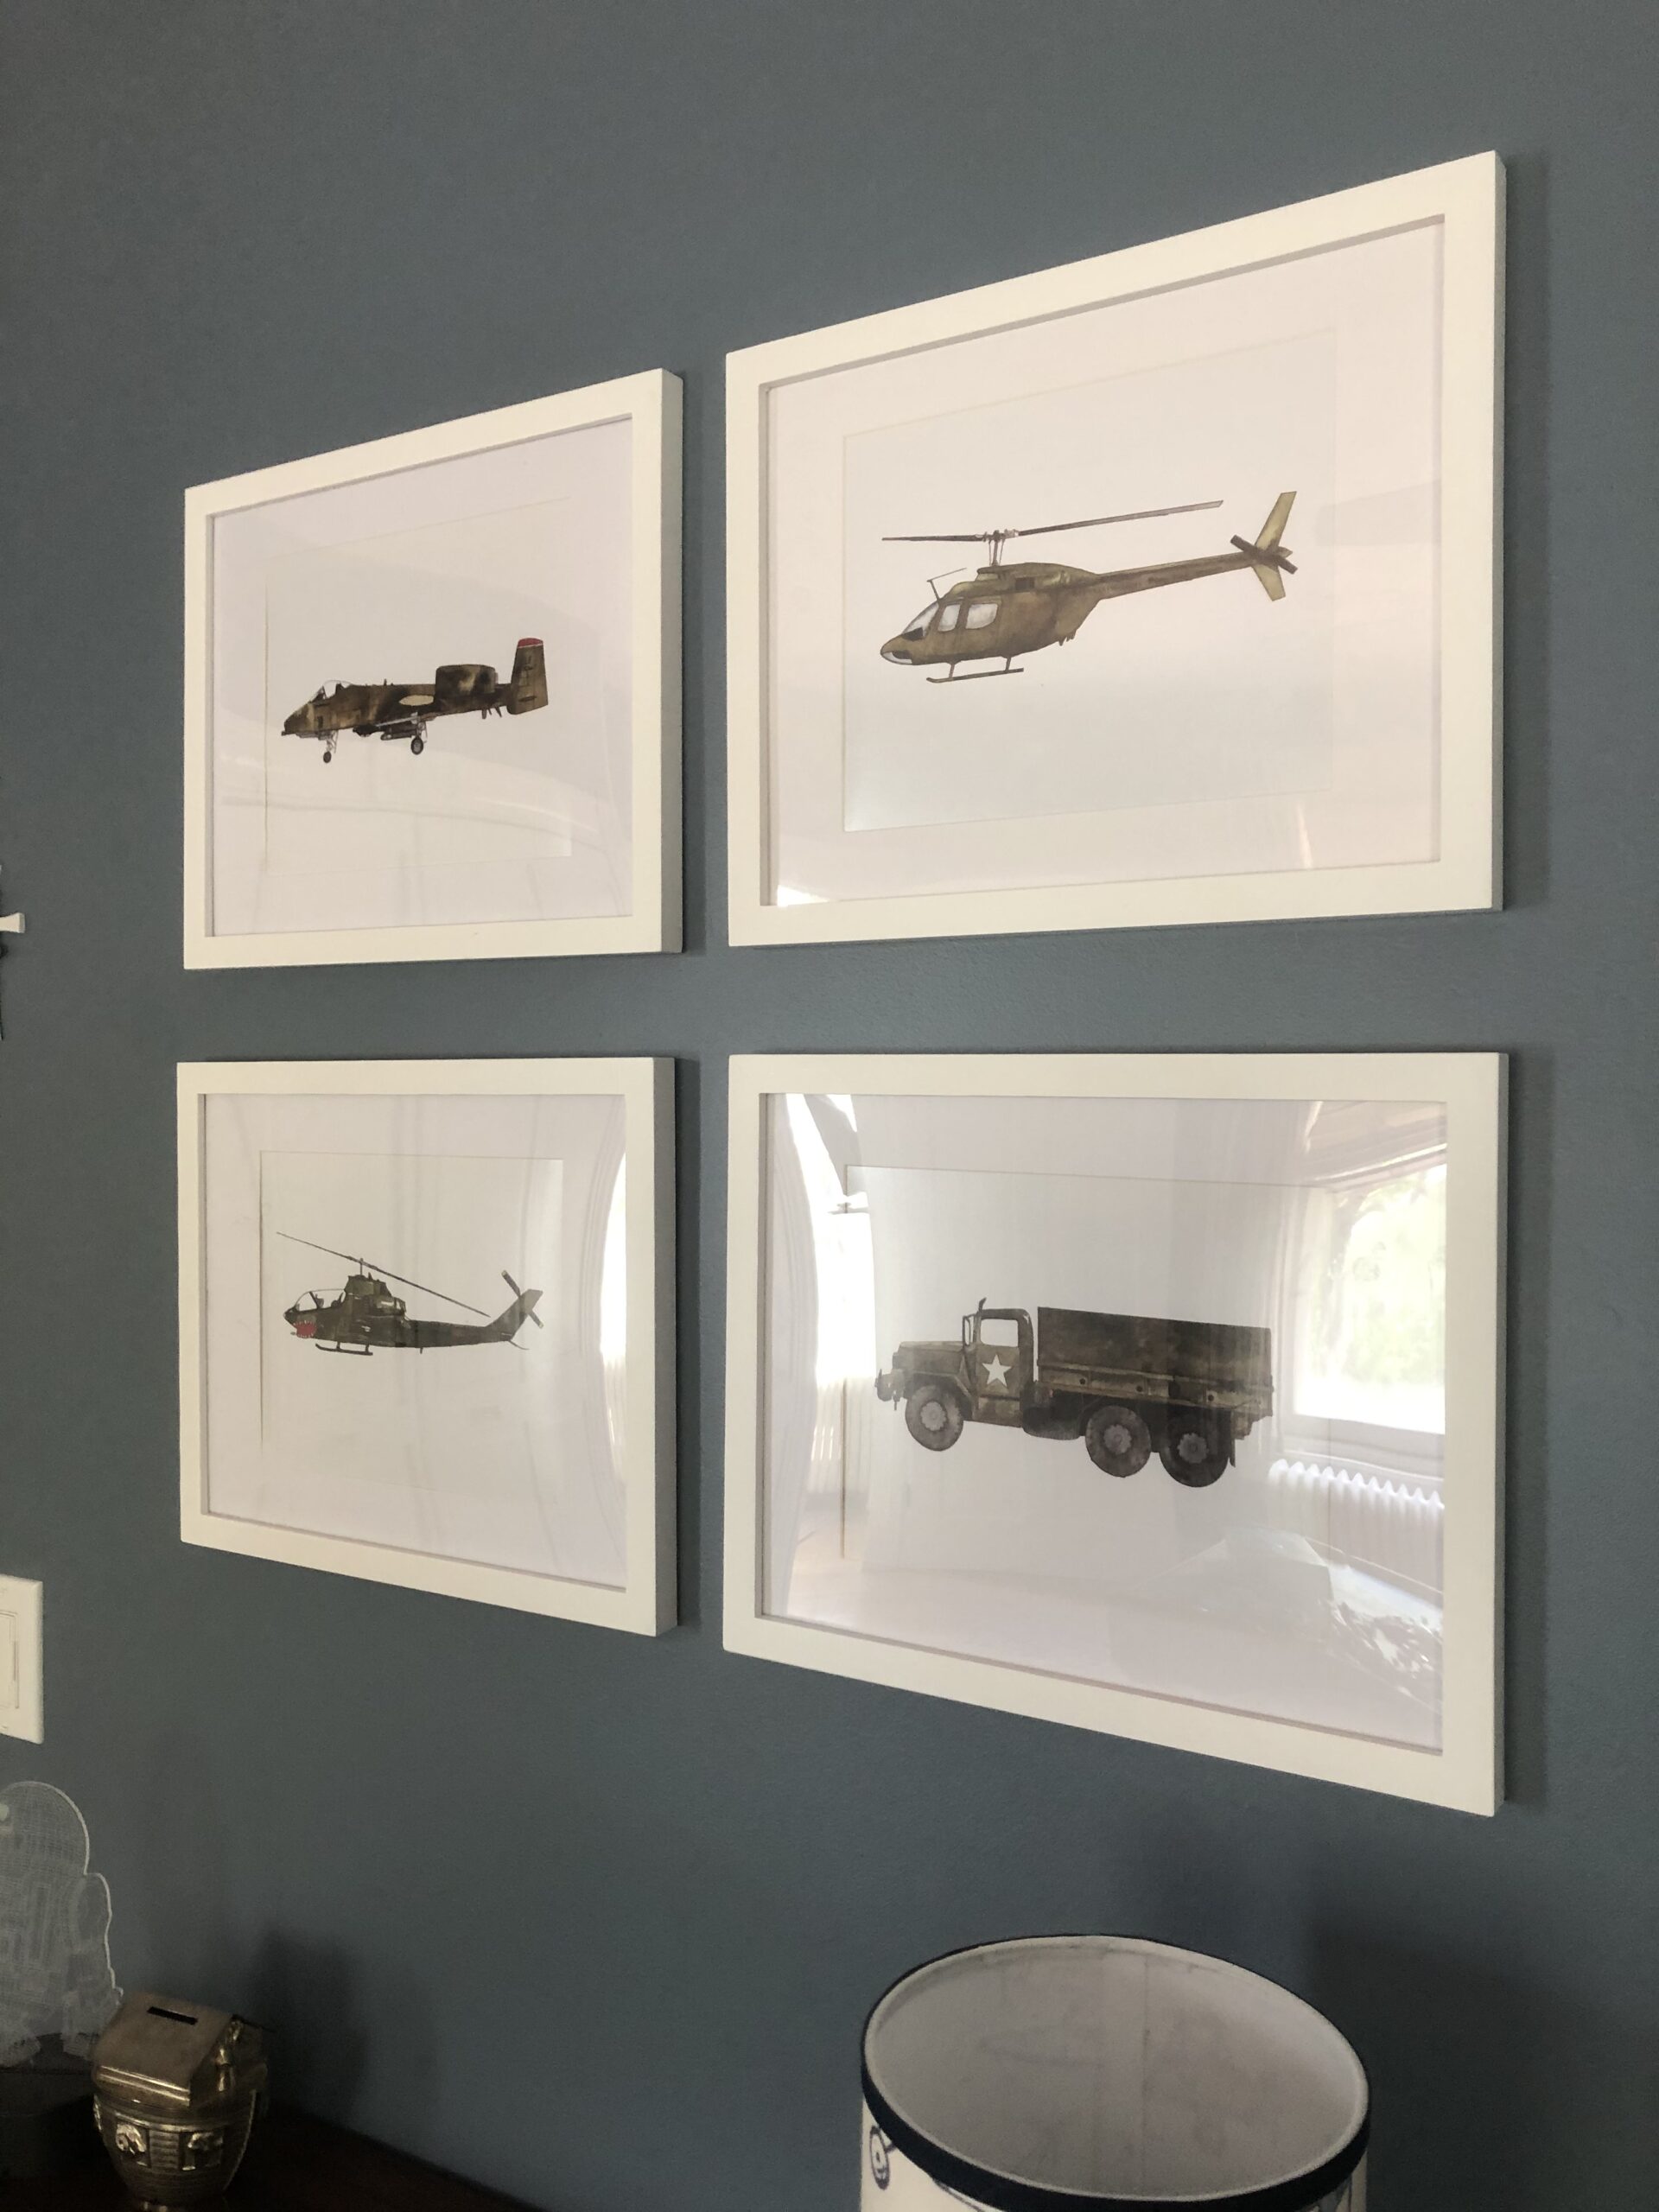
With everything off the walls, I decided to update his artwork. I removed all of the primary colors and shapes and opted for some military themed vehicles (our current obsession) that I found on Etsy at Gabe and Vince. I was able to digitally download the prints, from the original water color drawings. General Patton was very excited when he saw them! I also found some transportation themed letters to spell out his name on Etsy from MORILAND.

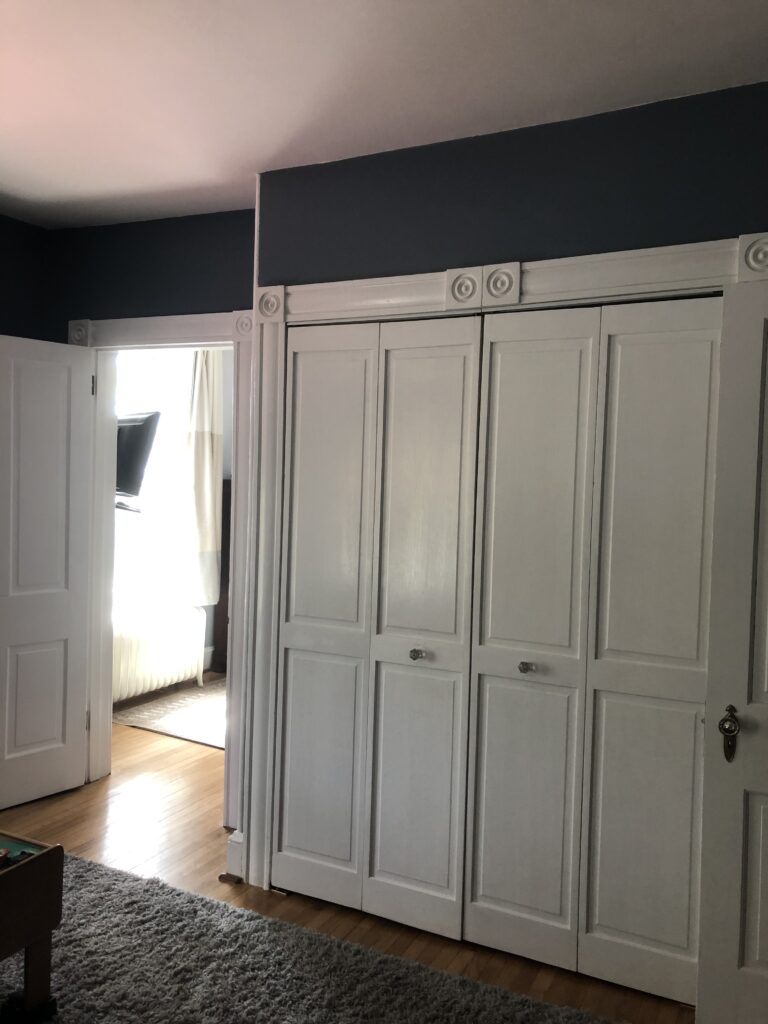
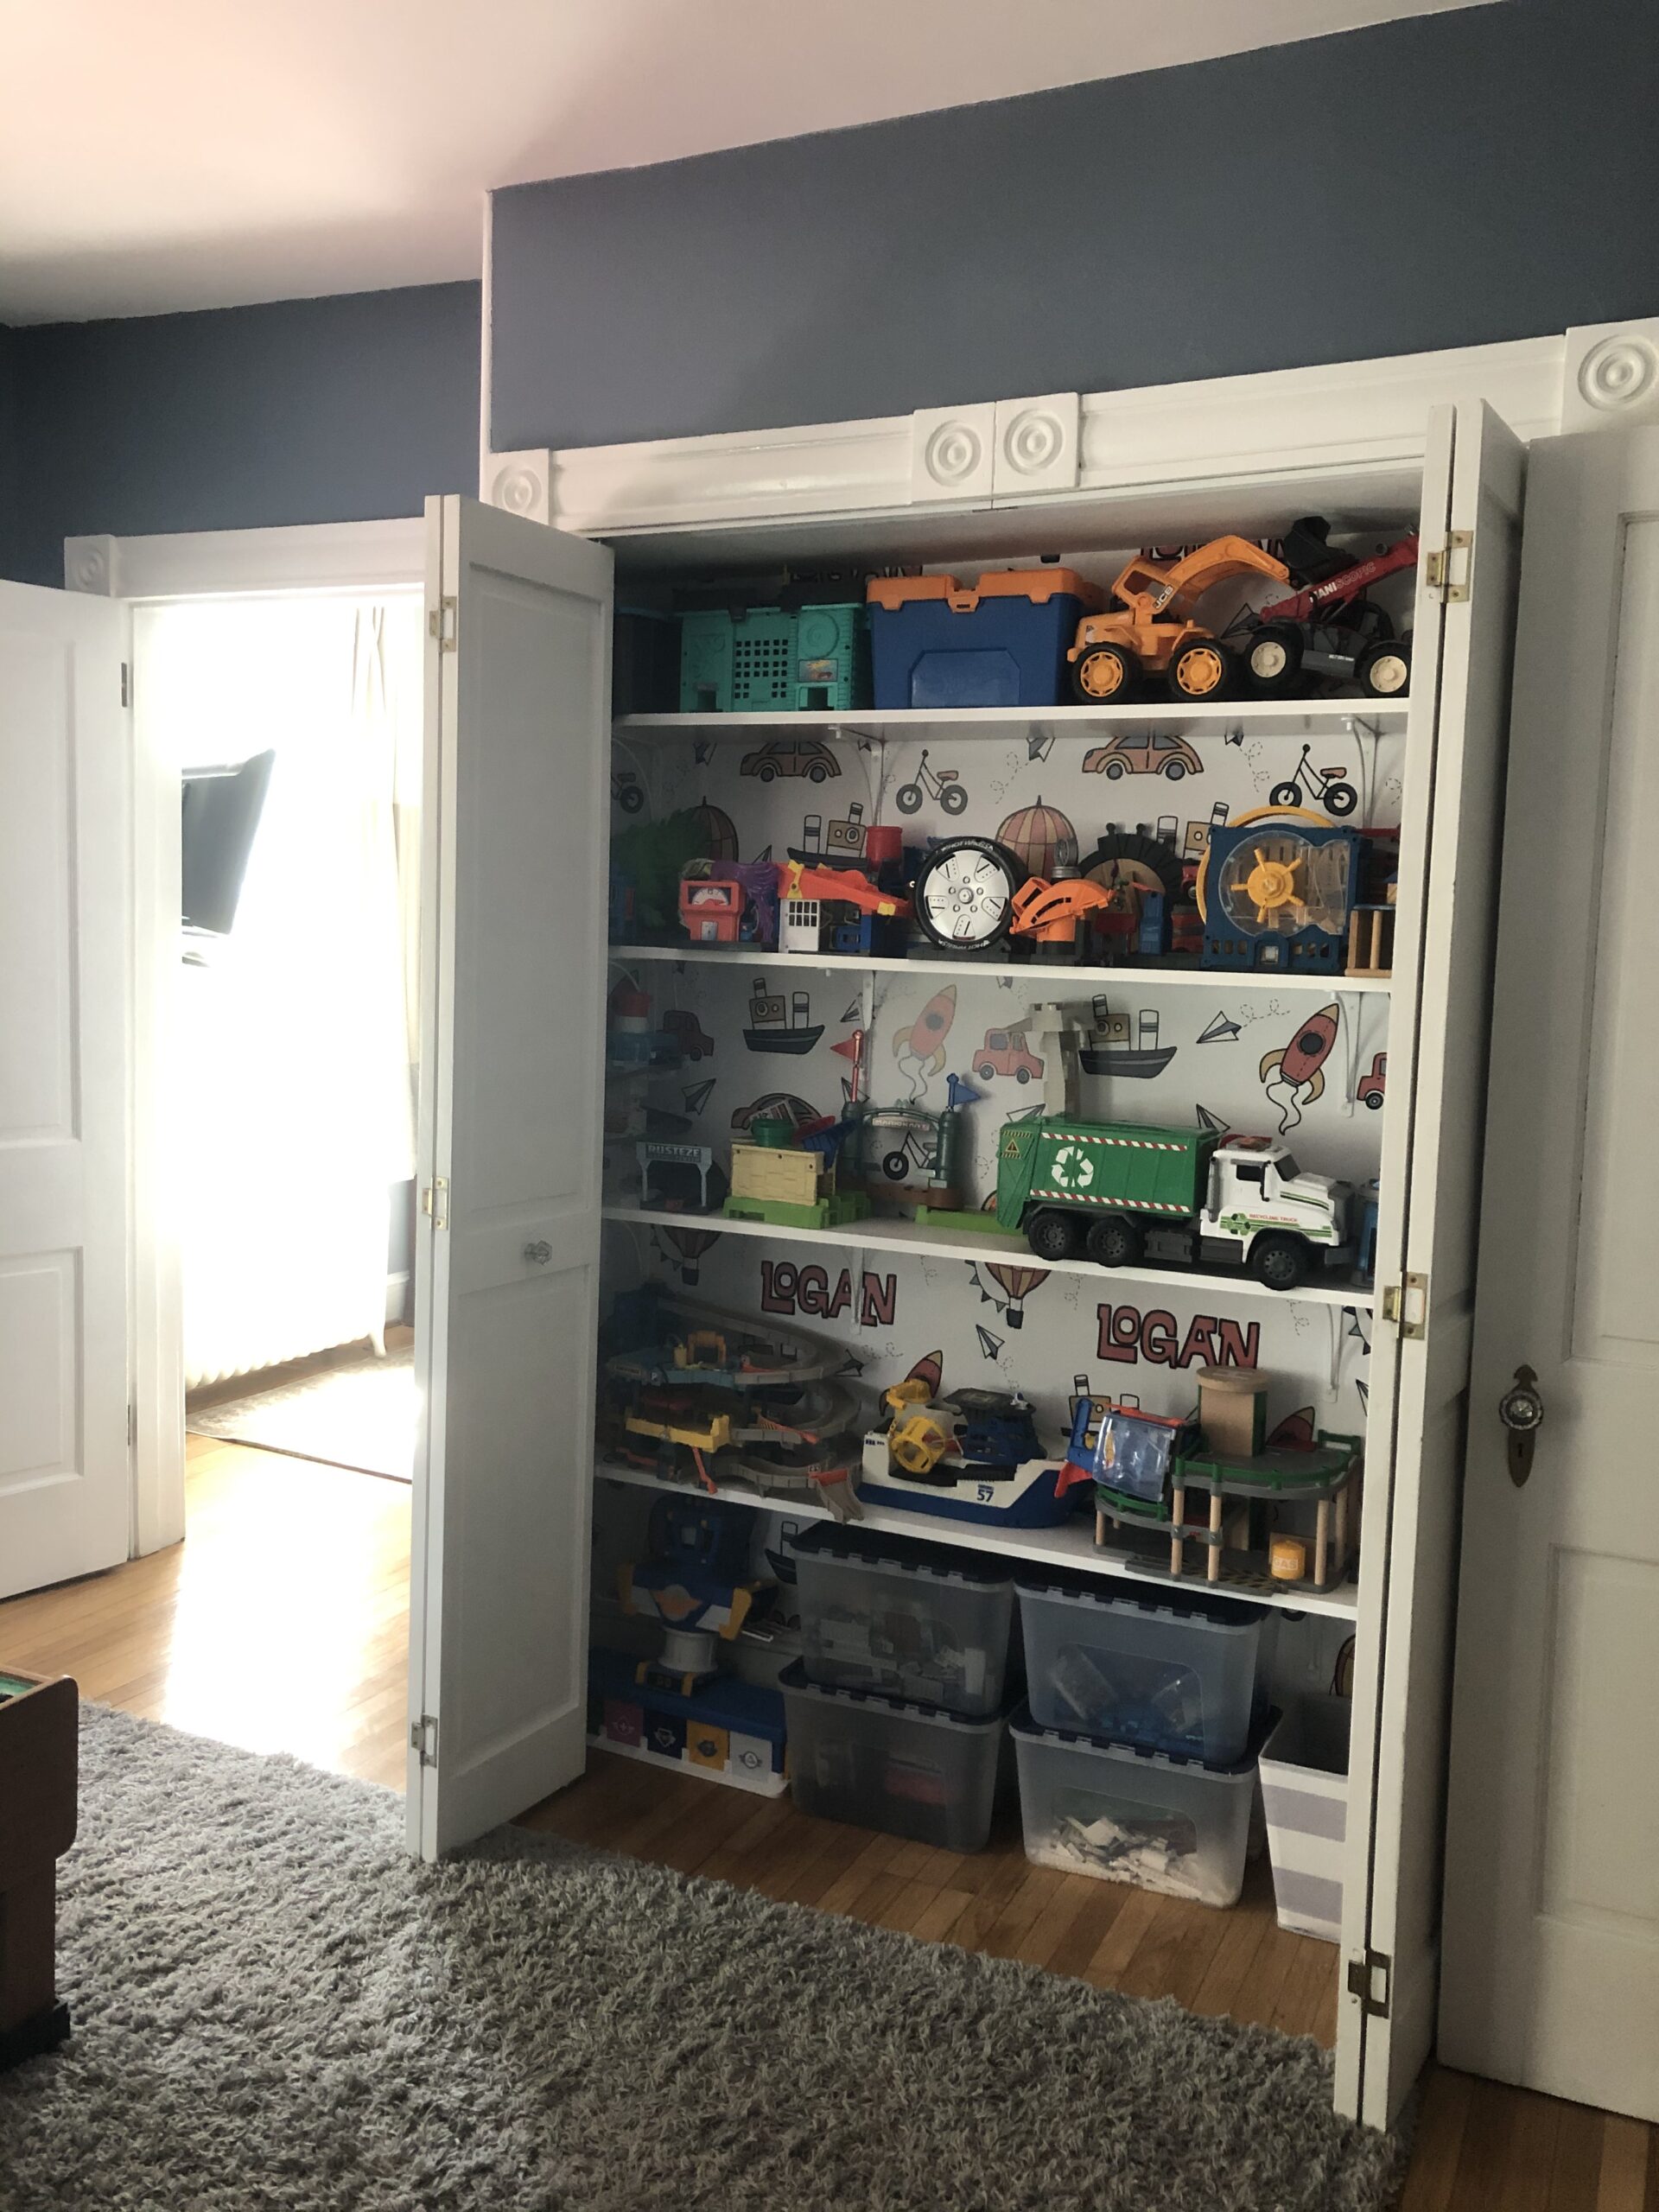
The very last thing to do, was to re-install the closet (if you can call it that) doors. Originally, this room served as a second floor family sitting room. There is a door connecting to the master bedroom (which made it perfect for his nursery!) and so a closet was not necessary. Over the years (most likely in the 20’s when the Saybolts owned the home) a small closet was added allowing it to be used officially as a bedroom. The “closet” is not deep enough for a hanger, or even an adult shoe, so a few years ago, I added custom wallpaper and shelving to store all of the toys that were scattered throughout the room (and house). The boy has never been happy about the doors being removed, but the overprotective parent inside me saw pinched fingers in the bi-fold doors, so off they came. Now, he requested to doors be re-installed, his reason, “bandits might take my toys”. You can’t argue with his logic.
Bandits Beware! 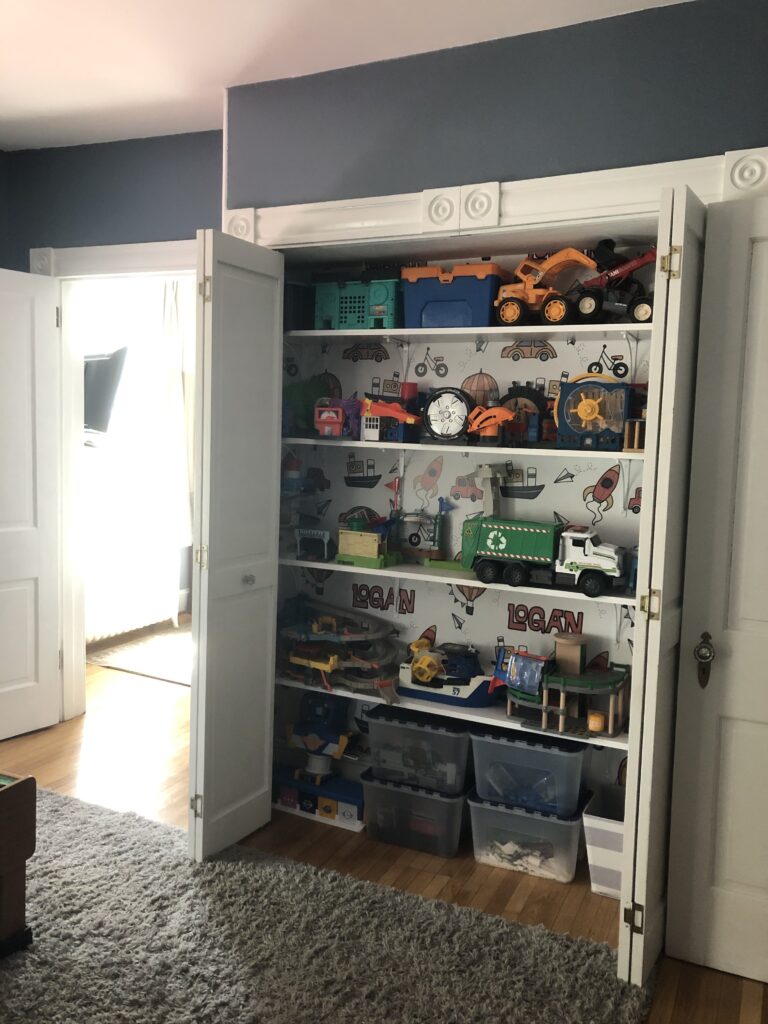

I have to confess that this post has been sitting in draft form for about a month now… have you ever tried to take photos of a 5 year old boys room??? Each time I would stage for a photo, things would be torn out of their hiding spaces, spread all over the floor, and some sort of battle between Captain America and Paw Patrol would begin.
Well it is over now, I hope it wasn’t too long of a read 🙂 Until next time, stay safe!
